Scheduled Emails⚓︎
Use Scheduled Emails to send reports automatically to one or more recipients on a defined cadence.
Scheduled Emails in Back Office support three schedule types:
- Reports
- DataSources
- Files
Before you start⚓︎
Make sure email delivery is configured in your environment:
- Confirm SMTP is set up in Settings > Notifications.
- Confirm the sender address and notification templates are valid.
- Confirm the report is already available in the Back Office.
For SMTP setup details, see Notification Settings.
Create a scheduled email⚓︎
- In the Back Office, open the Scheduled Emails area.
- Click Add (or New Scheduled Email).
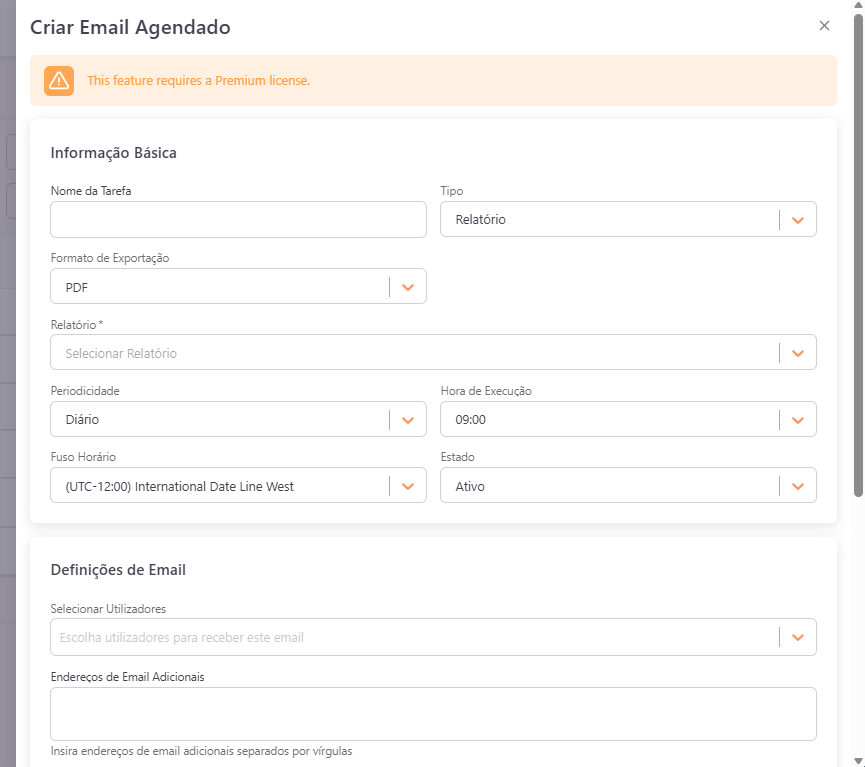
- Fill in the schedule details:
- Name: Internal name to identify the schedule.
- Type: Choose
Reports,DataSources, orFiles. - Report/Data Source/File: Select the target item for the selected type.
- Format: Select the output format available for your selected type.
- Status: Set to
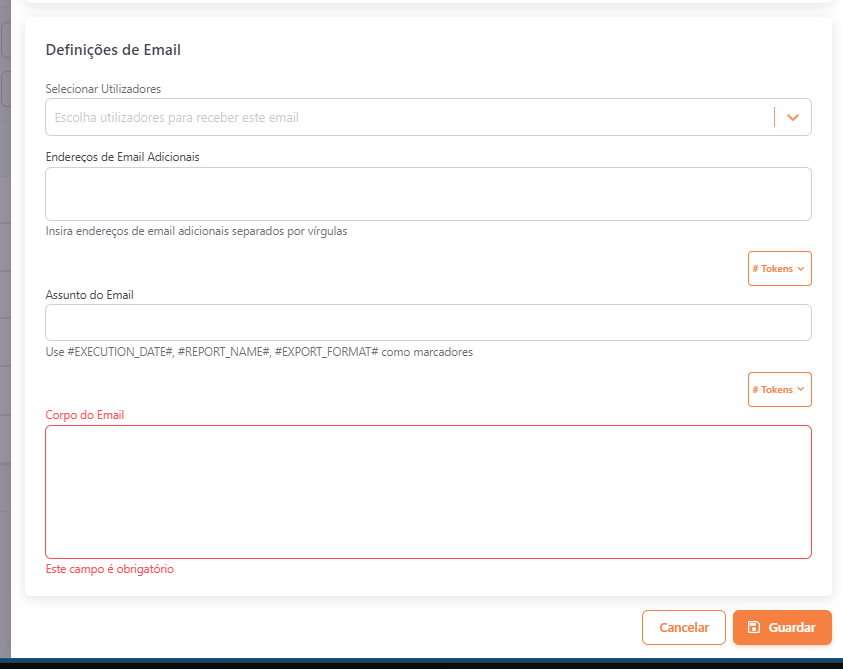
Activeto allow execution. - Configure recipients:
- Add at least one recipient.
- Use user recipients and/or direct email recipients, depending on your setup.
- Fill Email Subject and Email Body.
- Configure recurrence:
- Time zone (
TimeZoneId) - Execution Time
- Recurrence Type:
Daily,Weekly, orMonthly - If
Weekly, select execution weekdays. - If
Monthly, select execution day of month. - Save the schedule.
Note
Schedules associated with reports/data sources can be blocked by capacity schedule restrictions. If "Block access outside schedule" is enabled for the related capacity, schedule creation/update can fail with a conflict.
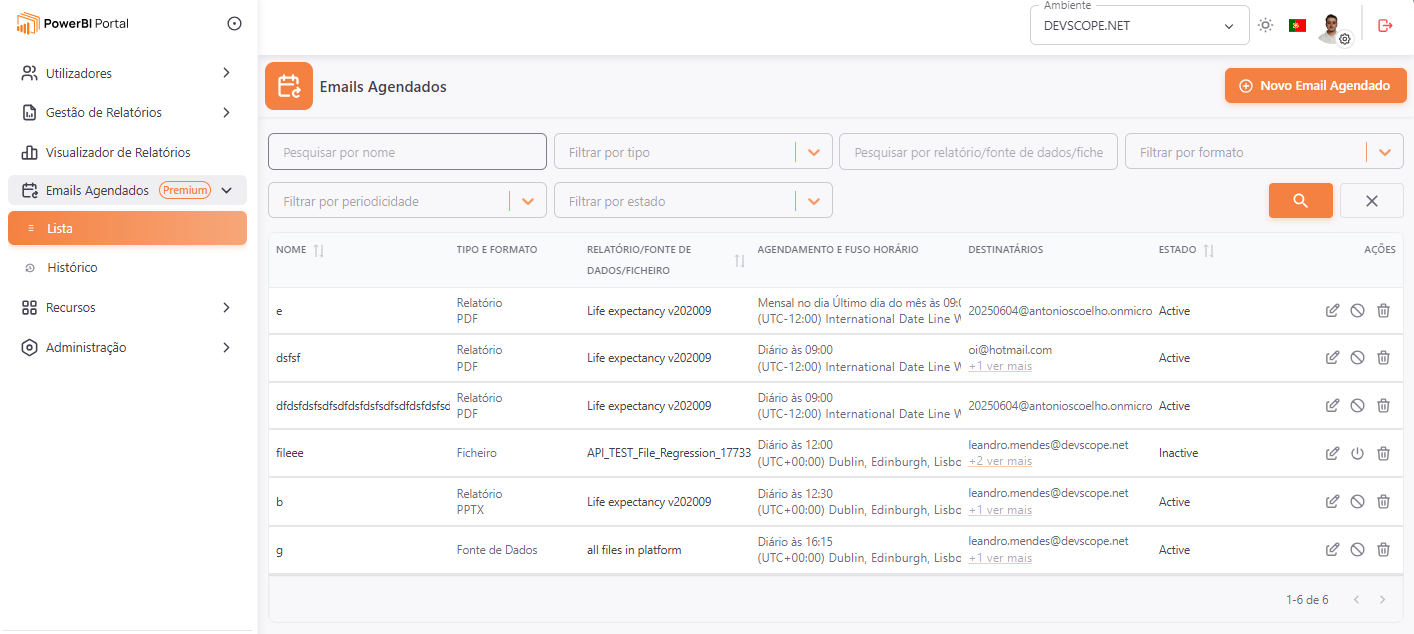
Scheduled Emails list⚓︎
Create Scheduled Email (basic settings)⚓︎
Create Scheduled Email (email settings)⚓︎
Validate delivery⚓︎
After saving and enabling a schedule:
- Wait for the next execution window.
- Confirm recipients received the email.
- Check attachment format and report content.
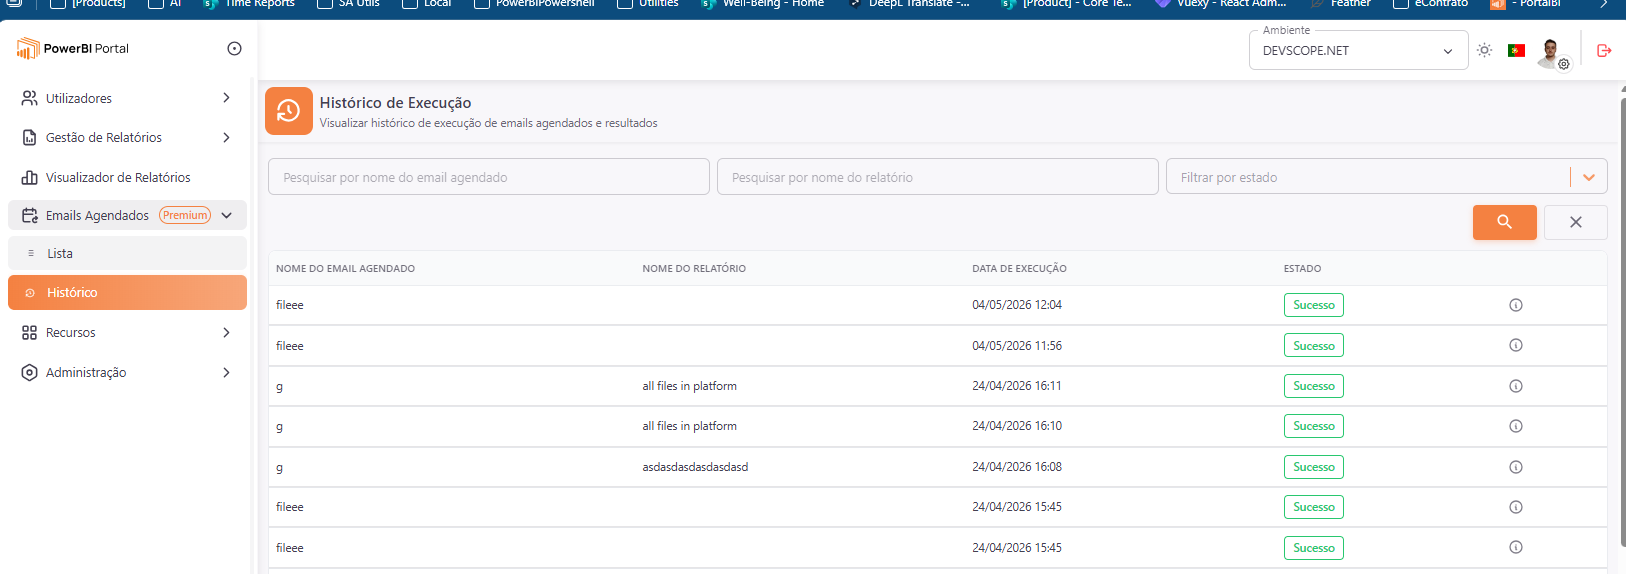
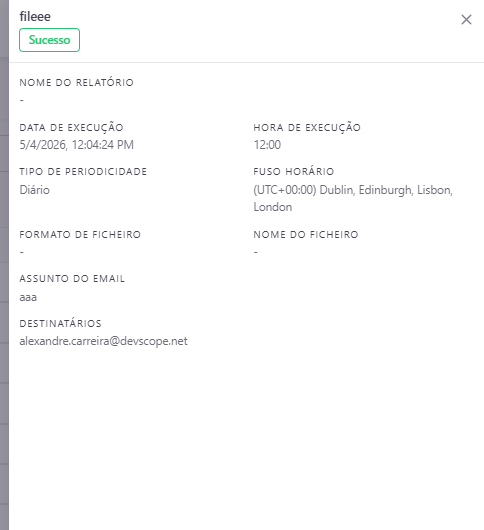
- Review execution status/errors in Scheduled Emails History.
Scheduled Emails history⚓︎
Common issues⚓︎
- No email received: Validate SMTP settings and sender permissions in Notification Settings.
- Attachment missing or invalid: Check selected type, export configuration, and selected format.
- Schedule did not trigger: Verify time zone, execution time, recurrence settings, and that status is
Active. - Intermittent failures: Check service limits and retry on the next run window.
- History status is Failed: Check Scheduled Emails History details and then validate related report/data source/file access and notification configuration.
Next steps⚓︎
- Standardize subjects and message templates for scheduled communications.
- Create separate schedules per audience when recipients need different reports or recurrence windows.