Manual Configuration⚓︎
This one-time configuration is split into 5 steps you should follow to get PowerBI Portal ready to use at your organization. It is intended for advanced users or organizations with specific requirements. For the guided alternative, see the Configuration Guide.
Because PowerBI Portal follows strict security measures put in place by Microsoft, the configuration process must be performed by a user with administrator permissions in your Power BI tenant and Microsoft Azure subscription.
Info
PowerBI Portal does not access any of your personal data nor does it store any of your organization's data.
Step 1 - Create your own Azure AD Application⚓︎
In your Azure Portal, you will need to create an Azure application to allow PowerBI Portal to access your Power BI reports (in the following example the application will be named 'PowerBI Portal App' - you may use any other name).
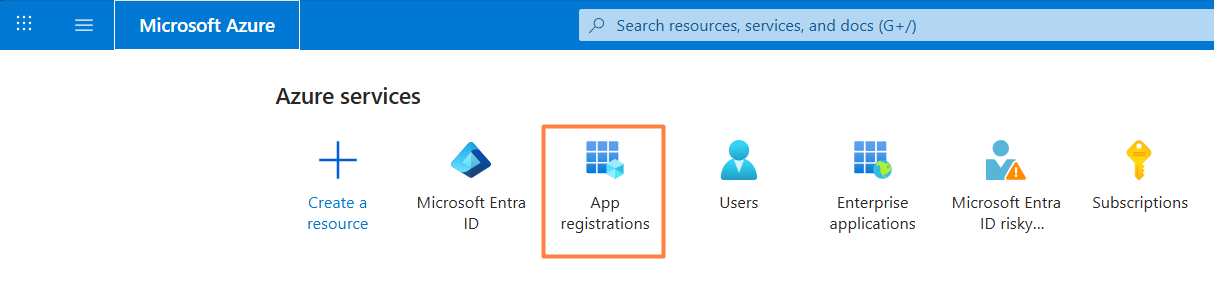
- Open Azure Portal and go to App Registrations
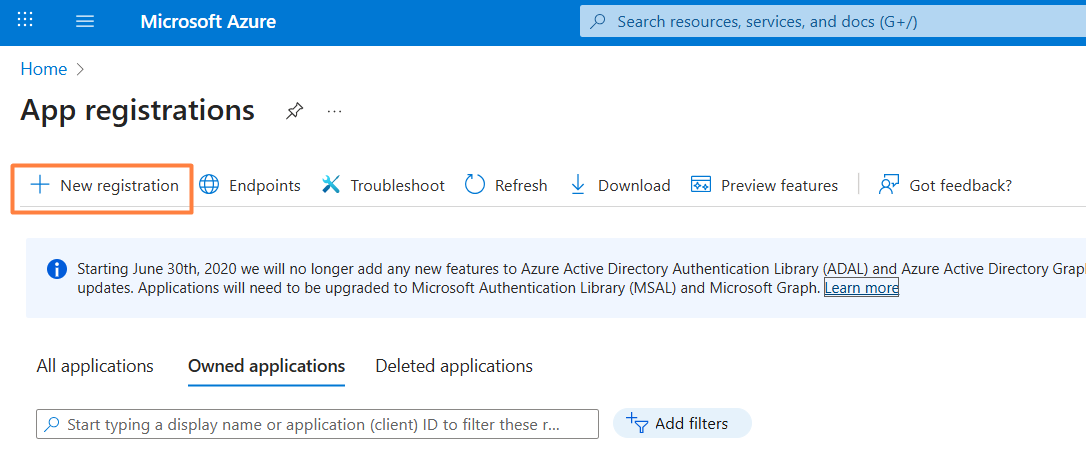
- Click on 'New registration' to create a new application
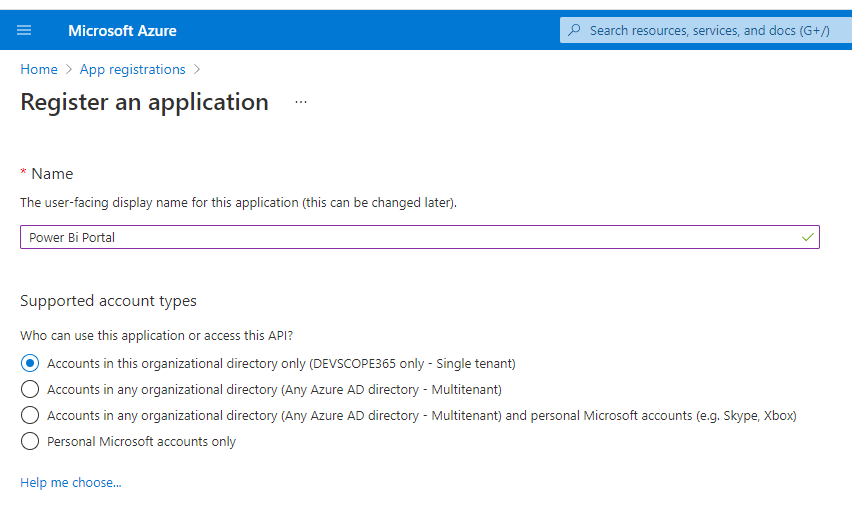
Please fill in the name of the new application and create the application.
Get tenant ID and application values⚓︎
To get those values, use the following steps:
- From App registrations, select your application.
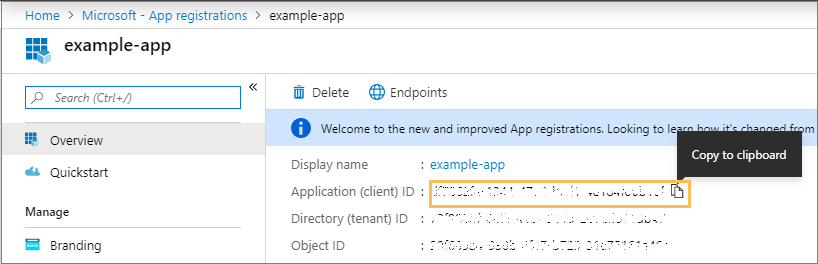
- Copy the Directory (tenant) ID. You will need it at the end of this step.
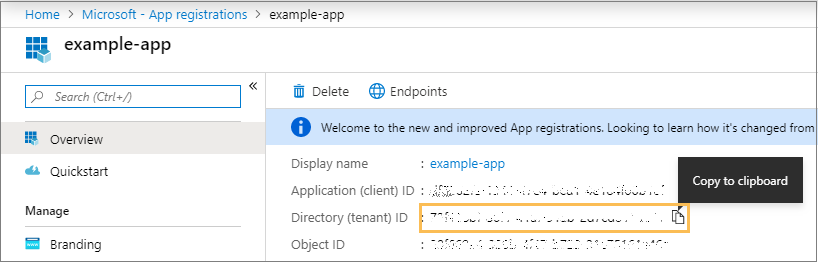
- The directory (tenant) ID can also be found in the default directory overview page.
- Copy the Application ID. You will need it at the end of this step.
Generate your application secret⚓︎
You can create a new application secret, using the following steps:
- From App registrations in Azure AD, select your application.
- Select Certificates & secrets.
- Select Client secrets -> New client secret.
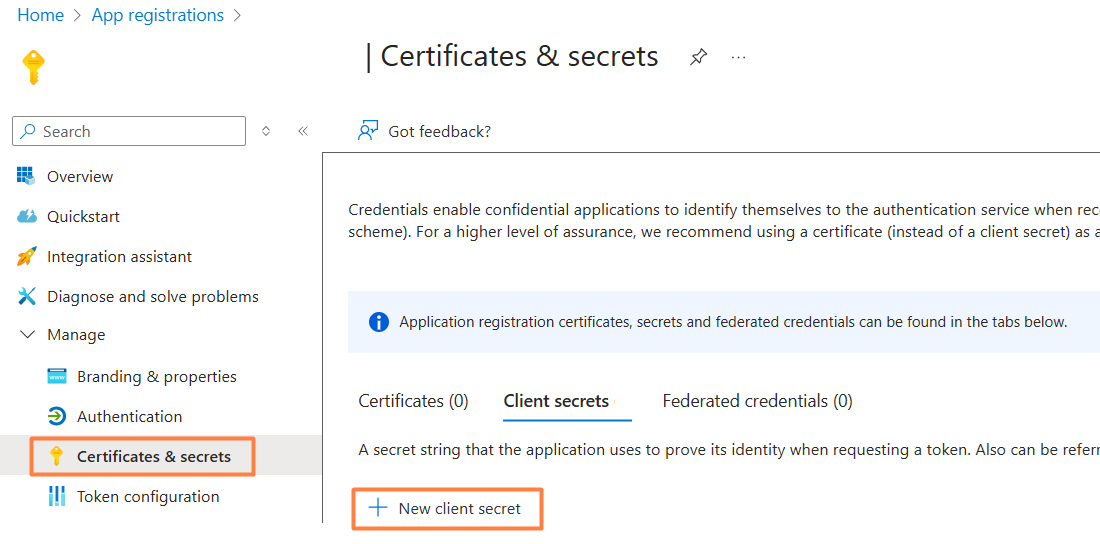
- Provide a description of the secret, and a duration. When done, select Add.
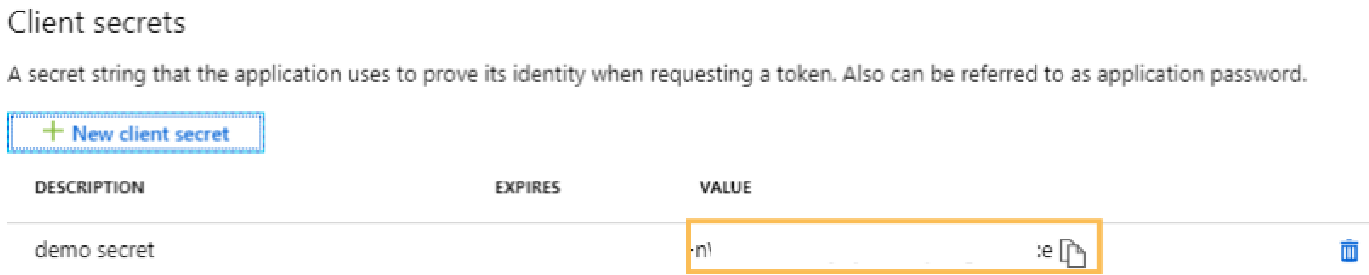
After saving the client secret, the value of the client secret is displayed. Copy this value because you won't be able to retrieve the key later.
For more information, please visit the Microsoft website.
Add the values to PowerBI Portal⚓︎
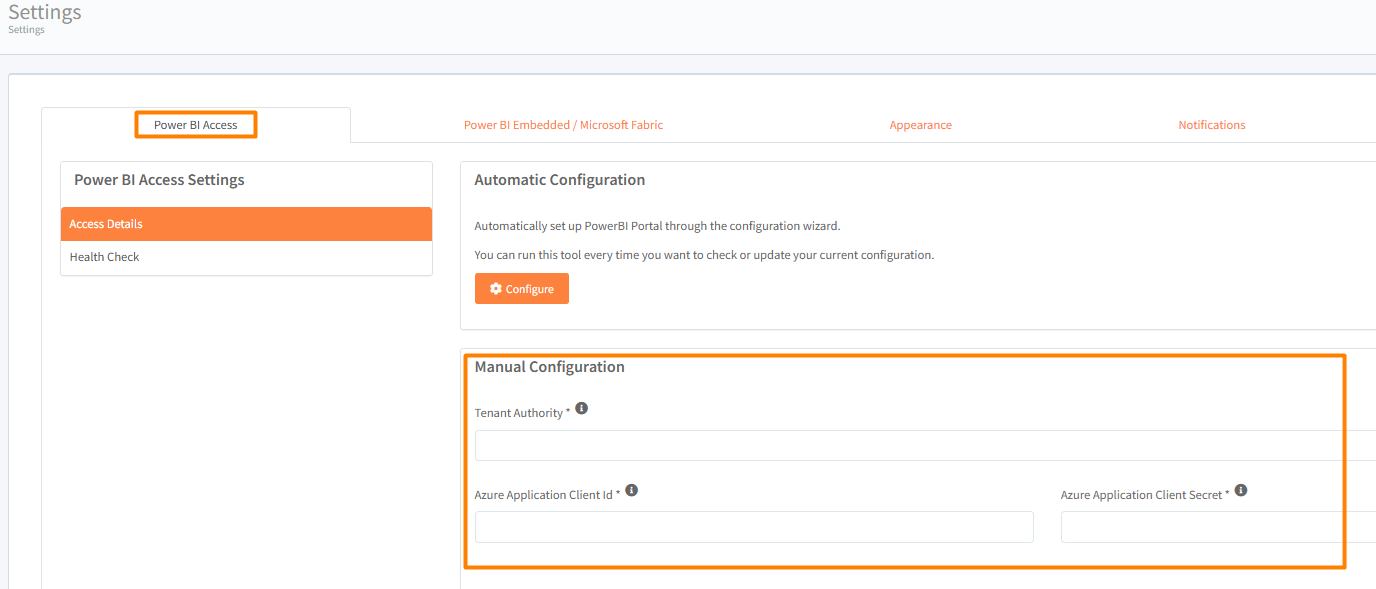
- In PowerBI Portal, go to Settings and open the Power BI Access tab.
- Expand Manual Configuration.
- Fill in Tenant Authority with your Azure AD tenant domain name or Tenant ID, Client ID with the Application ID, and Client Secret with the secret value.
- Click Save Configuration.
Step 2 - Create an Azure Group for PowerBI Portal and add the App Registration as a member⚓︎
Next, you must create a group for PowerBI Portal so it can access the Power BI workspaces you need to share.
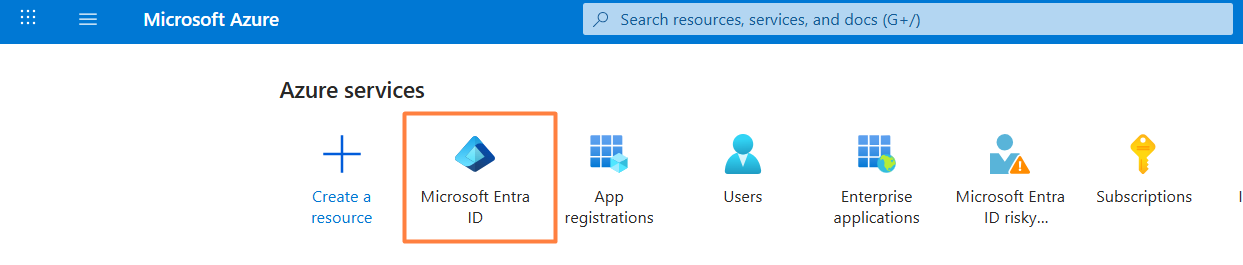
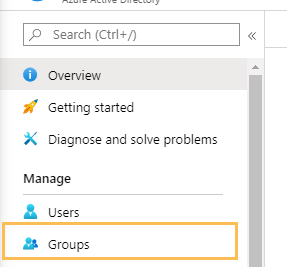
Log in to your Azure Portal, go to Microsoft Entra ID, and select "Groups".
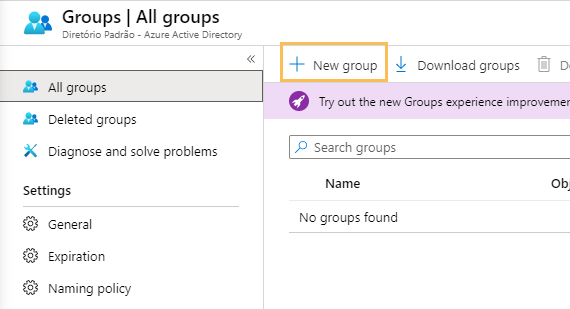
Click "New group" and create a security group called "PowerBI Portal".
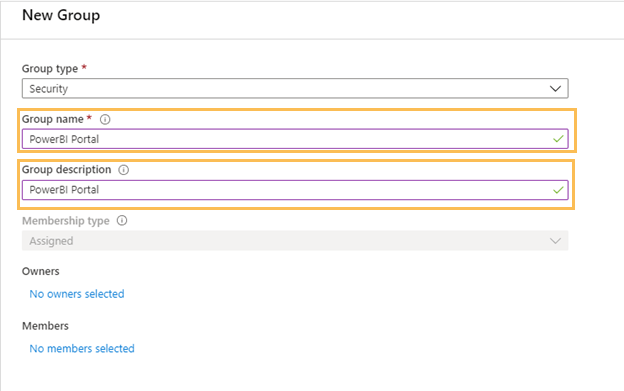
Fill "Group name" and "Group Description" fields.
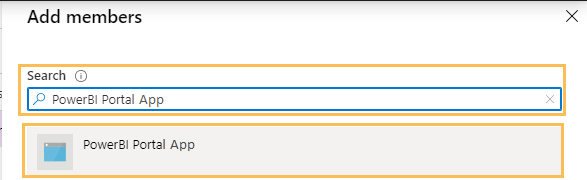
Next, go to the Members section and add the previously created application to the new group:
Step 3 - Add PowerBI Portal group to a specific security group in Power BI⚓︎
In this step, you will add PowerBI Portal to a specific security group in the Power BI tenant settings. Without API permissions, PowerBI Portal won't be able to access your Power BI workspaces.
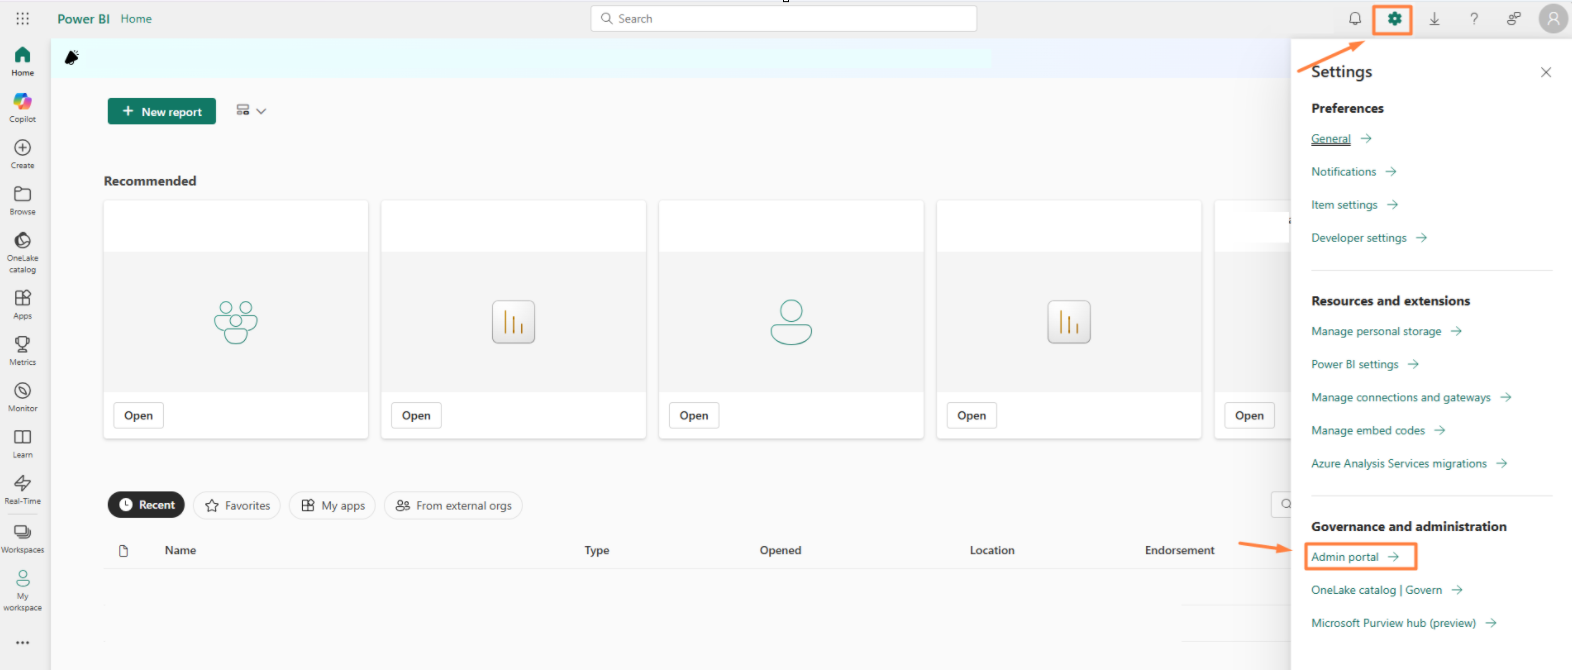
Go to Power BI Online, open "Settings" and select "Admin portal".
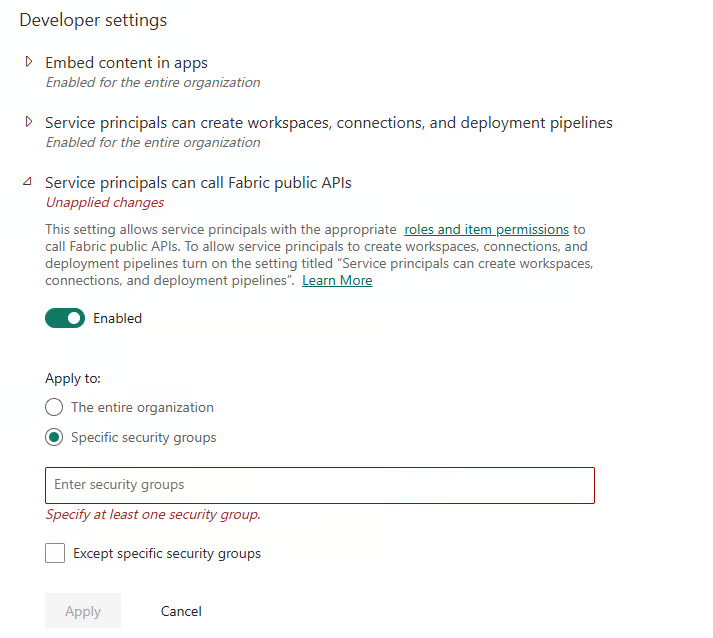
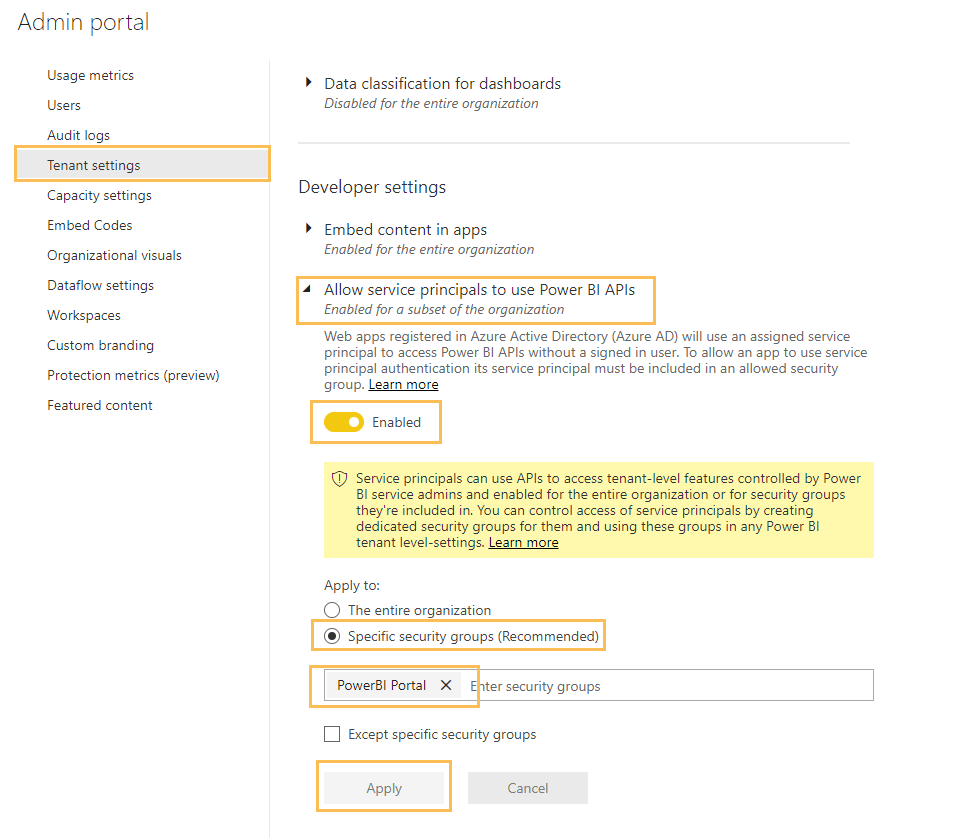
On Tenant Settings, go to the Developer Settings and toggle the Enabled slider under Service principals can call Fabric public APIs. In older tenants, this setting is named Allow service principals to use Power BI APIs. Next, apply it to a "specific security group", and add the PowerBI Portal security group you created on step 2.
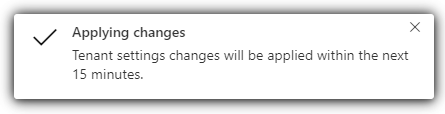
After clicking apply, the following message should appear. Keep in mind that during testing this process often took as much as 1 hour to complete.
Step 4 - Give PowerBI Portal Workspace Permission⚓︎
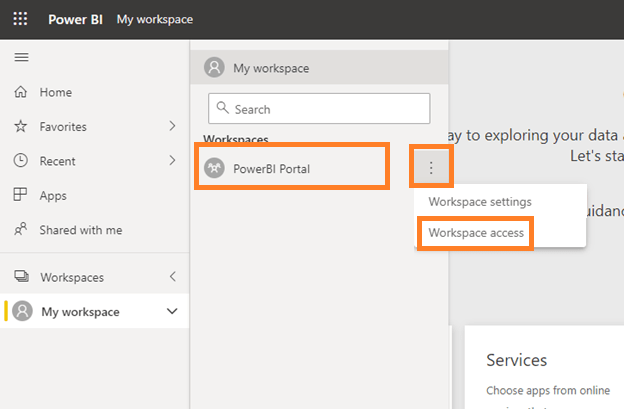
In order to share your reports, the PowerBI Portal group you created in Azure needs access to the workspaces they are a part of. In Power BI Online, go to "Workspaces", click the dots next to one of your workspaces, and select "Workspace access" from the drop-down menu.
Info
You should repeat the process in this step for each workspace with reports you need to share, otherwise you won't be able to find them later.
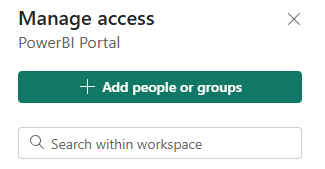
Click 'Add people or groups':
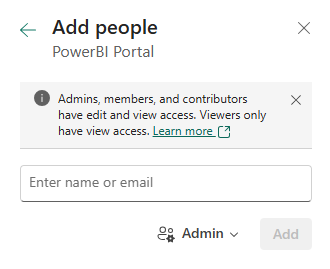
Select the 'PowerBI Portal' group, choose the 'Admin' role, click 'Add' and close the window. Also, search by the created App Registration and add it as an 'Admin' also.
Info
To grant the Azure group access to your workspace, you have to use a Power BI Pro or Premium account.
Step 5 - Add PowerBI Portal as a capacity administrator in Power BI Embedded / Fabric⚓︎
Info
Before making this configuration please make sure that your capacity is resumed before adding the administrators
Info
If your capacity is always resumed, you can skip the 'add as administrator' step since PowerBI Portal does not need to manage your capacity. However, please make sure you the capacity to the workspaces that you want to share.
To manage your subscription, you must add the previously created app registration as a capacity administrator in Azure Portal. This allows the PowerBI Portal to pause reports not being used and resume them once activity is detected.
The necessary steps depend on whether you are using Microsoft Fabric or Power BI Embedded.
Microsoft Fabric Capacity
- Please select your Capacity
- Then, click on "Power BI Capacity Administrators"
- Click "Add" to add the app registration created:
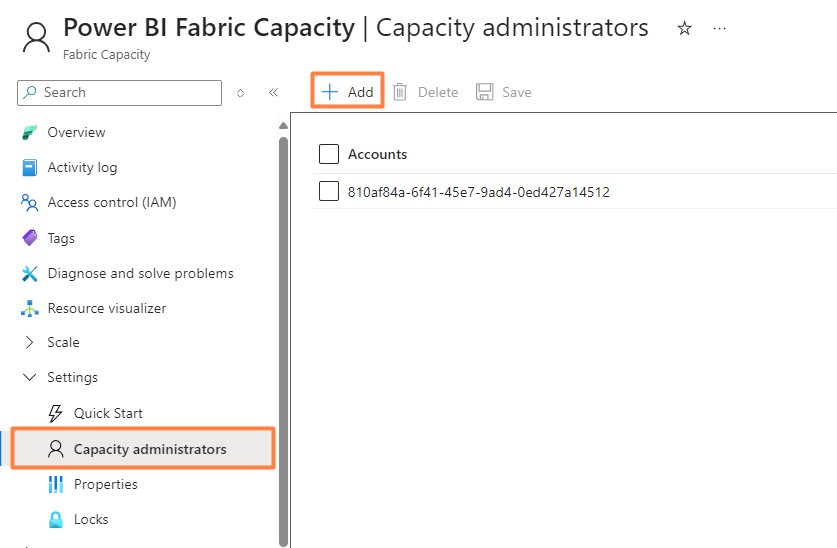
Adding a Fabric capacity administrator - Search and add it:
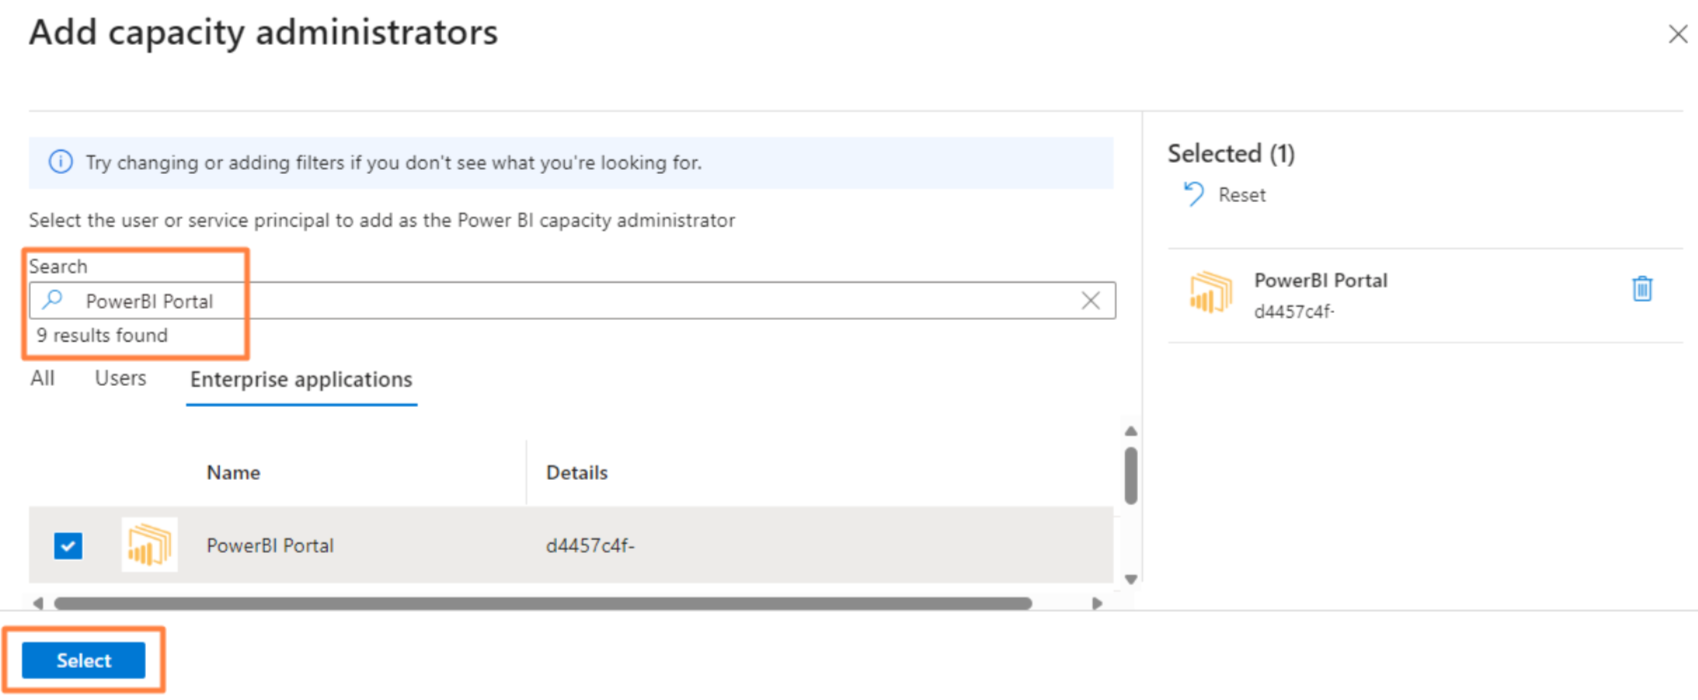
Searching for the app registration
- Click "Add" to add the app registration created:
- Also, you must give PowerBI Portal app registration the role of "Contributor" so that it can be used in the Capacity Service.
- Go to Access Control (IAM) and click 'Add':
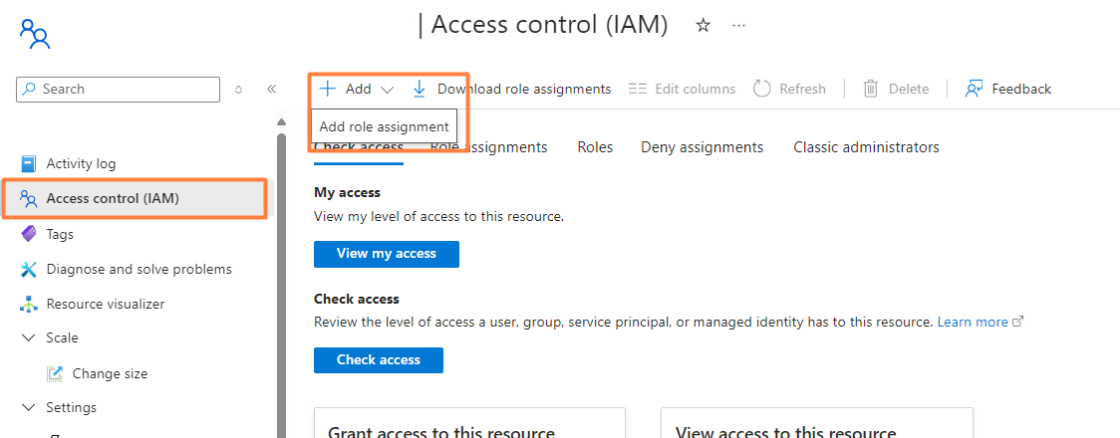
Access Control (IAM) for the Fabric capacity - Click on Role -> Privileged administrator roles, and select Contributor. Press Next:
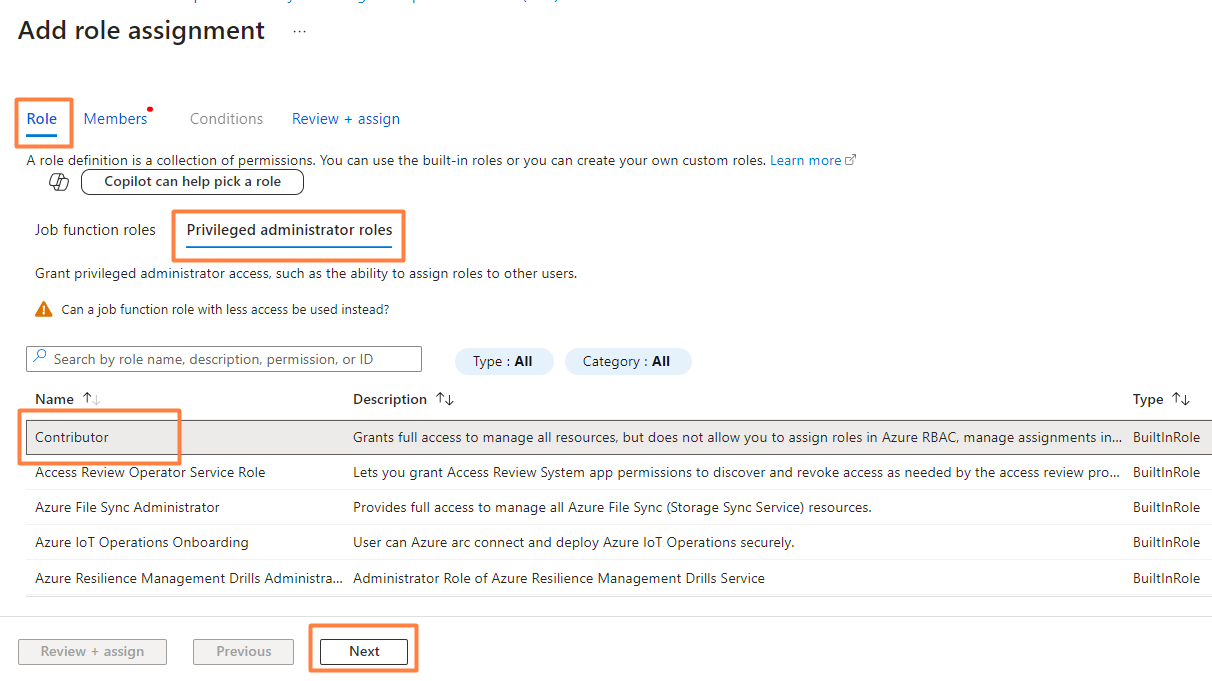
Selecting the Contributor role - On the Members tab, click on 'Select Members' and select the previously created application:
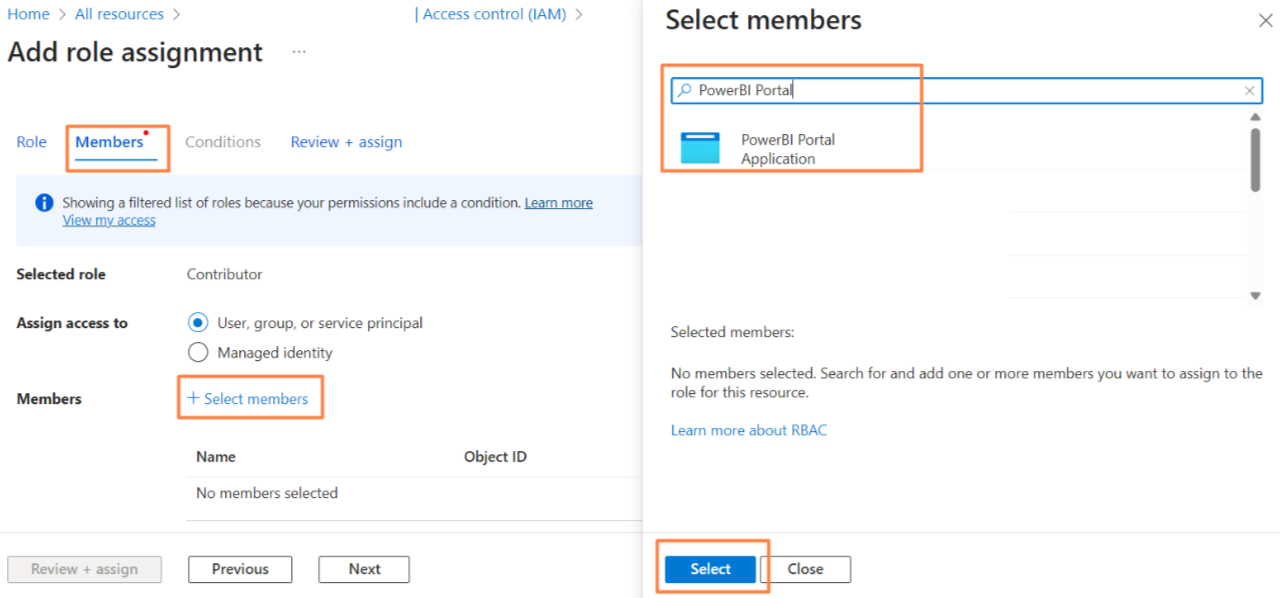
Selecting the app registration as a member
- Go to Access Control (IAM) and click 'Add':
Power BI Embedded Capacity
- Please select your Capacity
- Then, click on "Power BI Capacity Administrators"
- Click "Add" to add the app registration created:
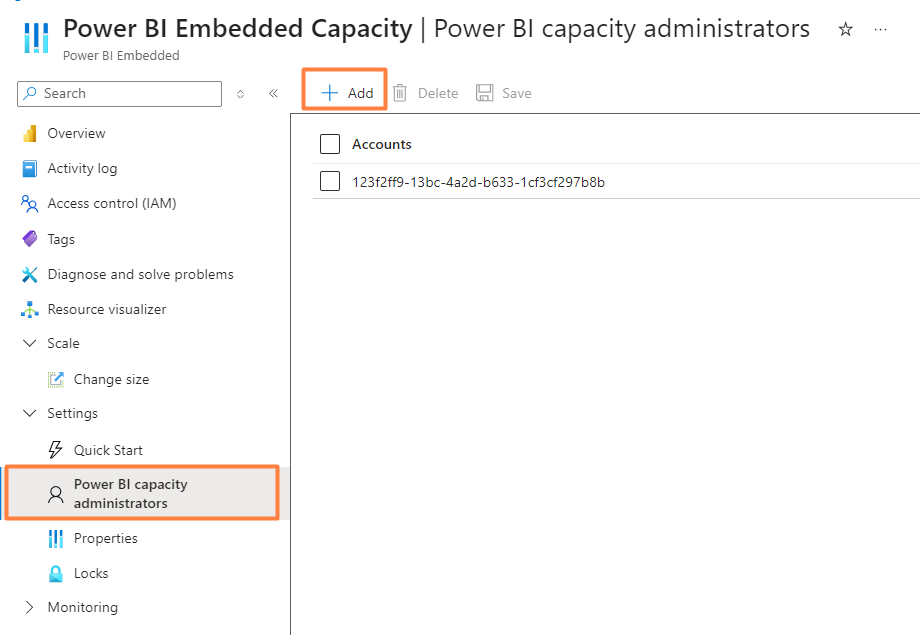
Adding a Power BI Embedded capacity administrator - Search and add it:
Searching for the app registration
- Click "Add" to add the app registration created:
- Also, you must give PowerBI Portal app registration the role of "Contributor" so that it can be used in the Capacity Service.
- Go to Access Control (IAM) and click 'Add':
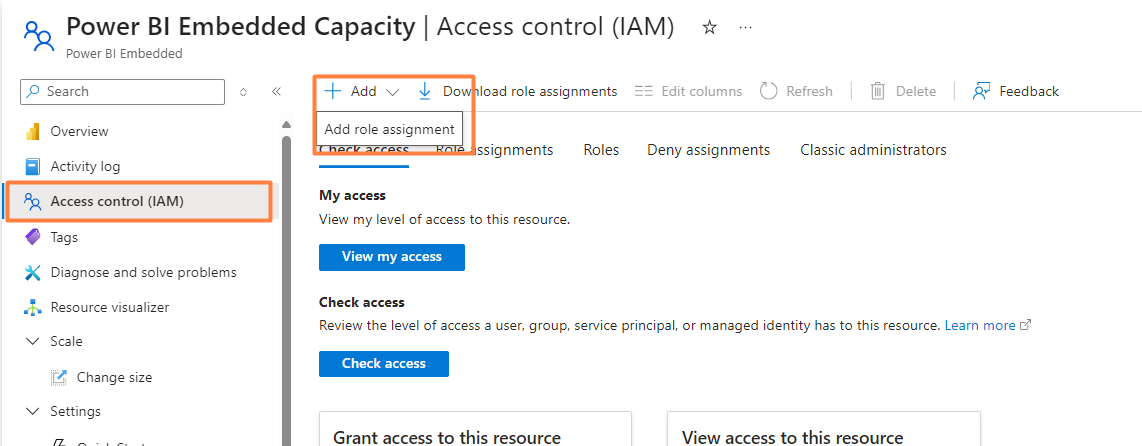
Access Control (IAM) for the Power BI Embedded capacity - Click on Role -> Privileged administrator roles, and select Contributor. Press Next:
Selecting the Contributor role - On the Members tab, click on 'Select Members' and select the previously created application:
Selecting the app registration as a member
- Go to Access Control (IAM) and click 'Add':
Finally, you need to associate your capacity with each Power BI Workspace in Power BI Service.
Info
For this step the user that makes this association needs to have a capacity contributor role, and a workspace admin role. More details here.
This step will also depend on whether you are using Microsoft Fabric or Power BI Embedded.
Microsoft Fabric Capacity
- On Power BI Service, click on Workspaces and then Workspace Settings:
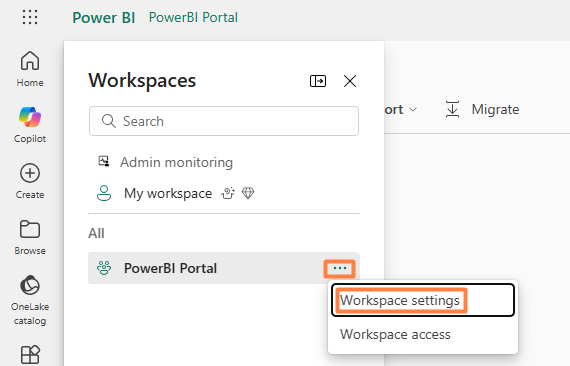
Workspace settings for a Fabric capacity - Click on License Info, and select Fabric capacity and choose the desired license capacity to be associated with the workspace:
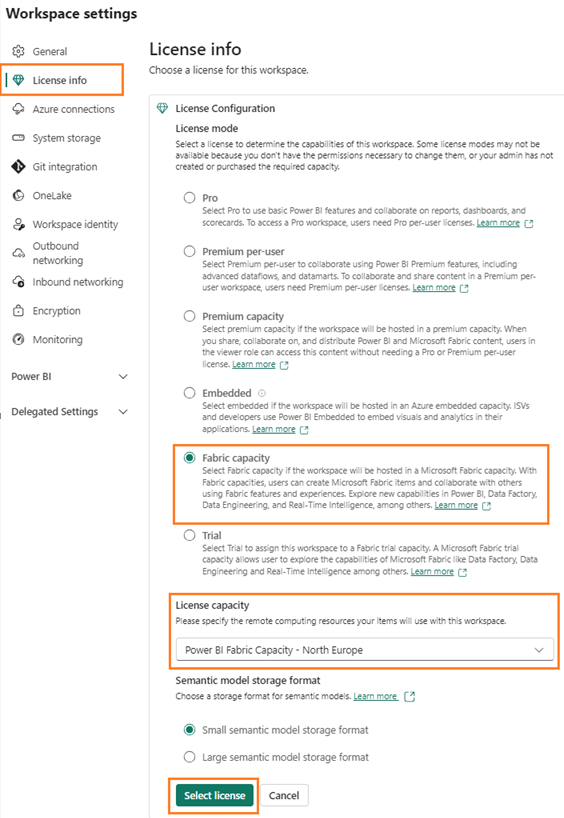
Associating a Fabric capacity with the workspace
Power BI Embedded Capacity
- On Power BI Service, click on Workspaces and then Workspace Settings:
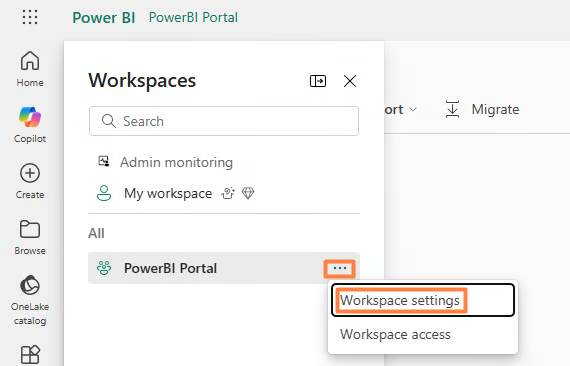
Workspace settings for a Power BI Embedded capacity - Click on License Info, and select Fabric capacity and choose the desired license capacity to be associated with the workspace:
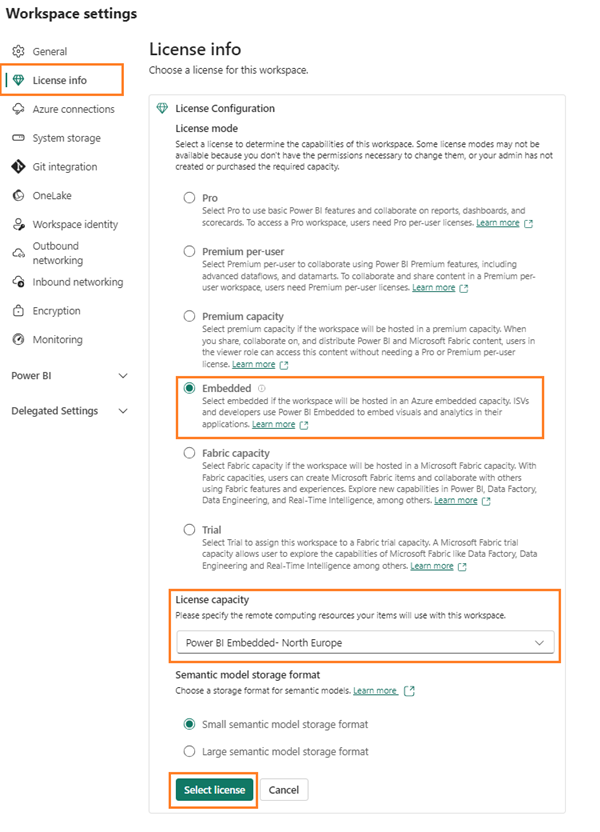
Associating a Power BI Embedded capacity with the workspace
Add the capacity to PowerBI Portal⚓︎
Finally, you need to fill in all the capacity configuration parameters in the PowerBI Portal settings, as shown in the image below.
- In PowerBI Portal, go to Settings, then Power BI Premium Capacities.
- Click Add New Capacity.
- Fill in the Subscription Details.
- If the Trial Mode section is shown, make sure Ignore capacity is turned off.
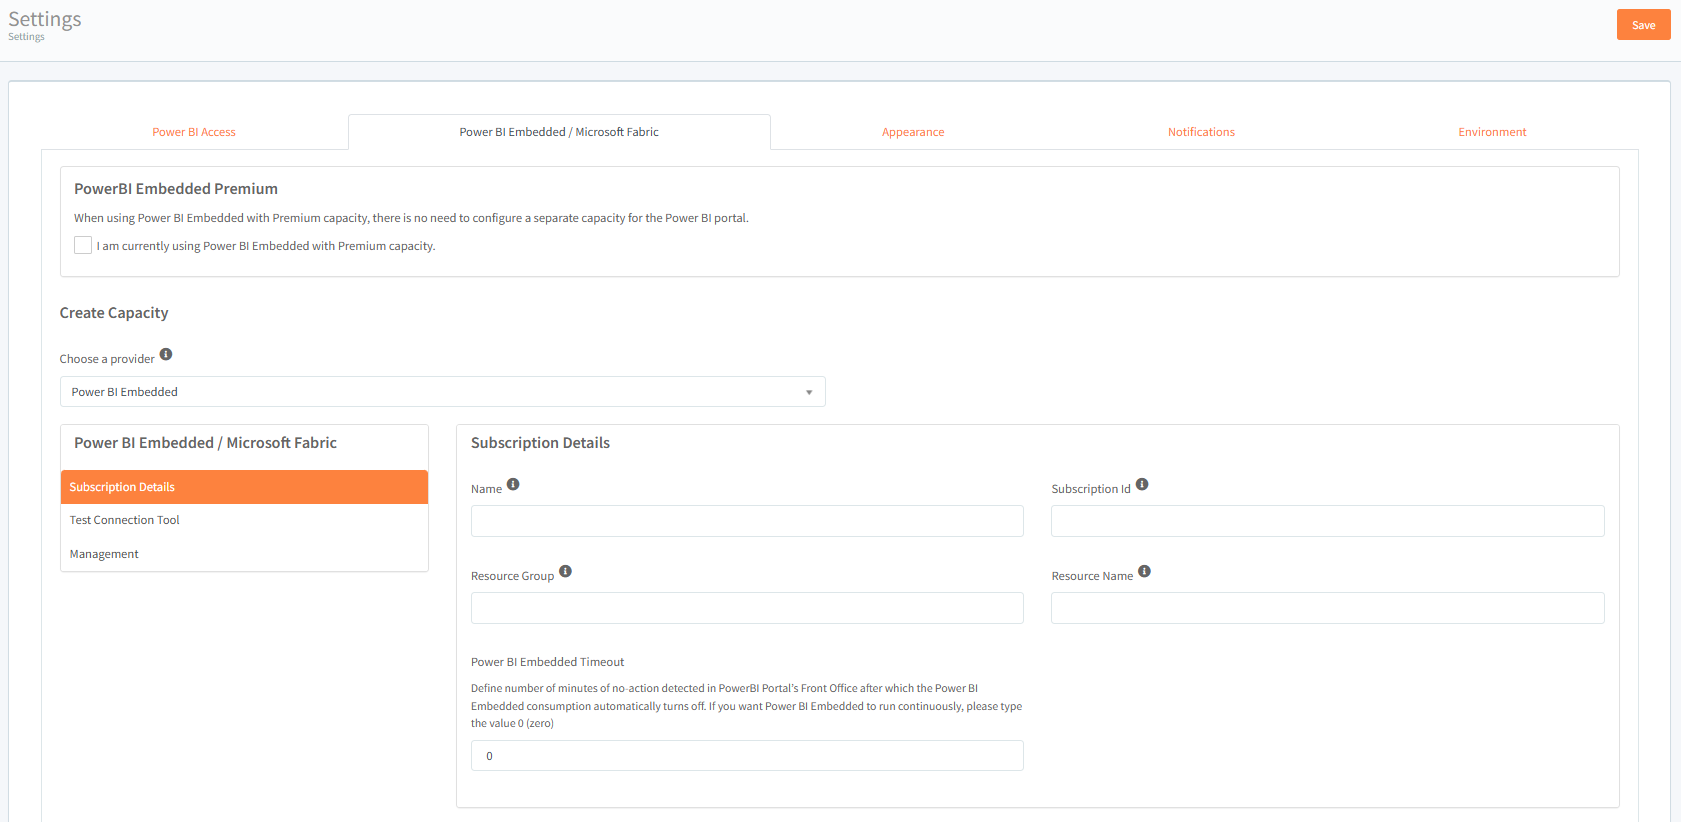
After completing these steps, you can test if PowerBI Portal can successfully manage your capacity, through the Power BI Premium Capacities settings. Start by checking the current capacity status in Azure by clicking Check Status as shown in the image below.
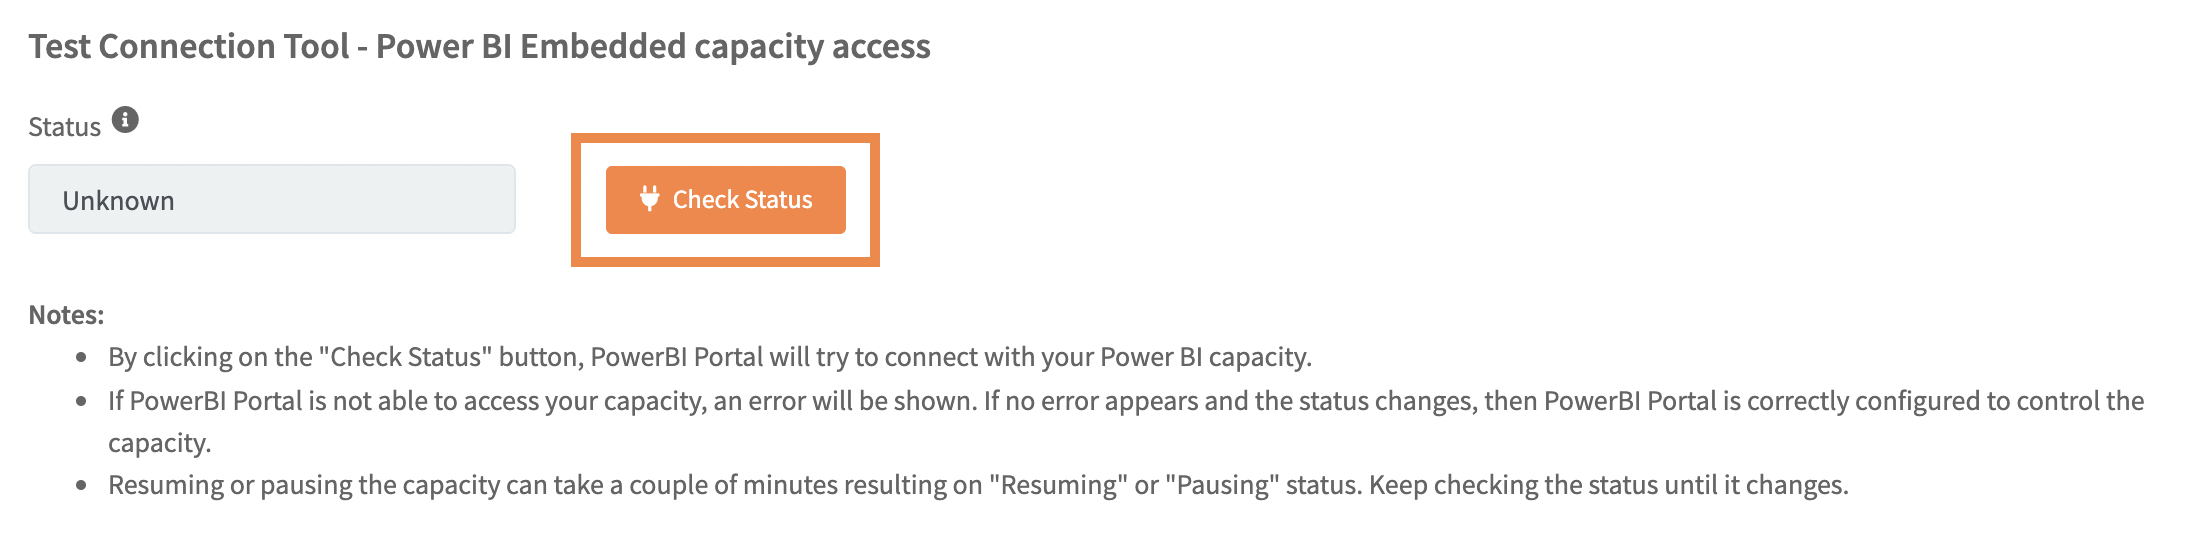
Then, if the status changes from "Unknown" to "Resumed" or "Paused", that means that PowerBI Portal is correctly configured to access your capacity. Note that you can also manually resume or pause the capacity through this settings page section.
PowerBI Portal is now operational. Thank you for following all the steps in this guide. If you need any help with the setup, please contact our team at support@devscope.net.