Tokens and RLS⚓︎
Token Usage⚓︎
You can use or create tokens that attribute value to users. To do so, when editing the users, you can add a custom claim (token), to use it later on a page/report filter or on RLS. Keep in mind we also provide default tokens (Year, Month, etc.)
Example: We created a Custom claim for Demo User named Country and with the value ‘Canada’, for Demo User2 the same thing with the value ‘Japan’:
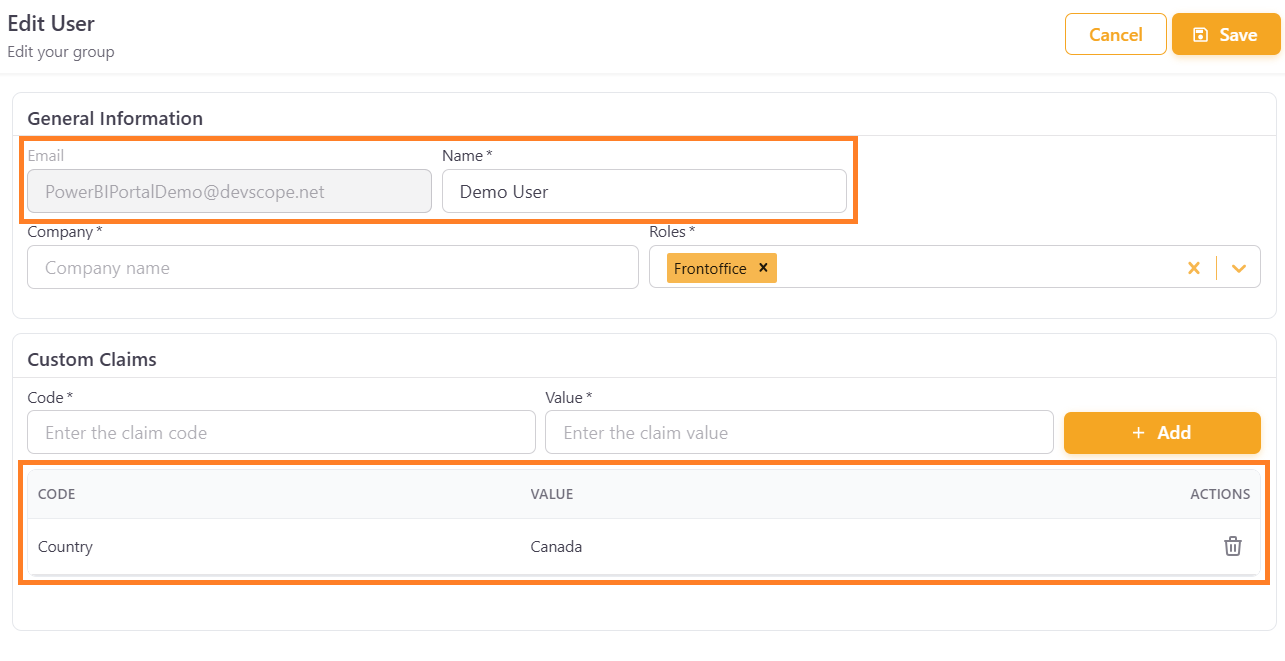
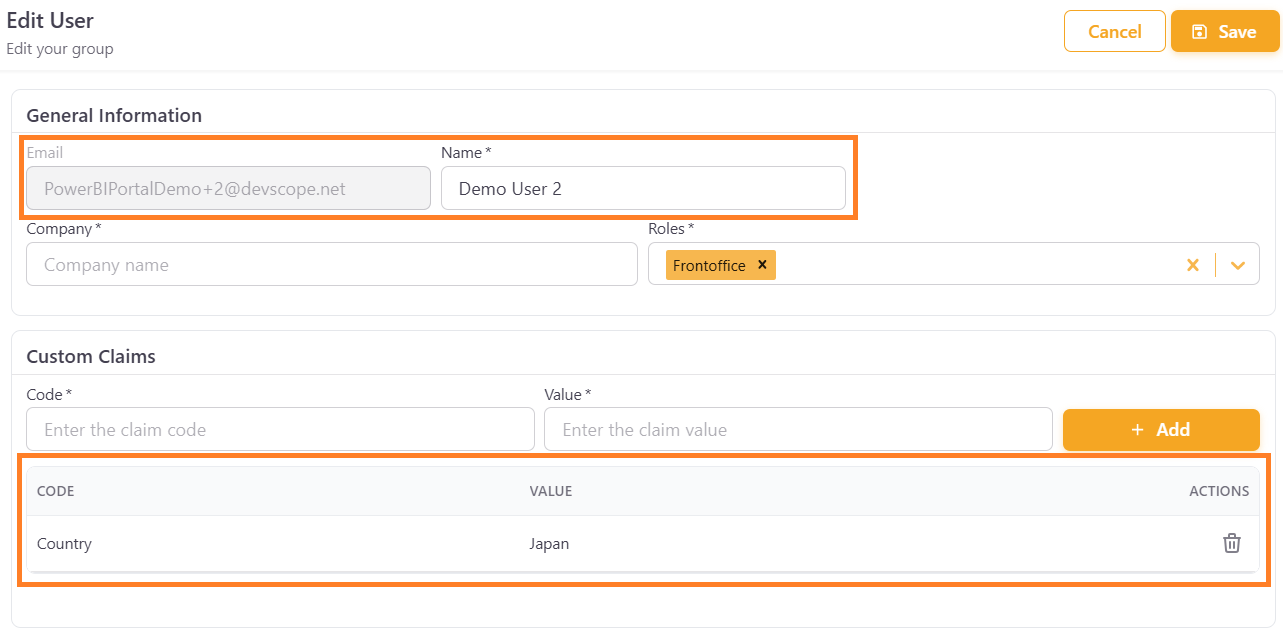
The Custom Claim can contain anything you'd want to use to filter or apply a value to each user.
Each custom claim becomes a token that you use as #USER_<claim name>#. For example, the claim named Country is used as #USER_Country#. Custom claims set on groups become #GROUP_<claim name>#.
To apply tokens filters on the page or whole report, you need to apply them on the provided textboxes.
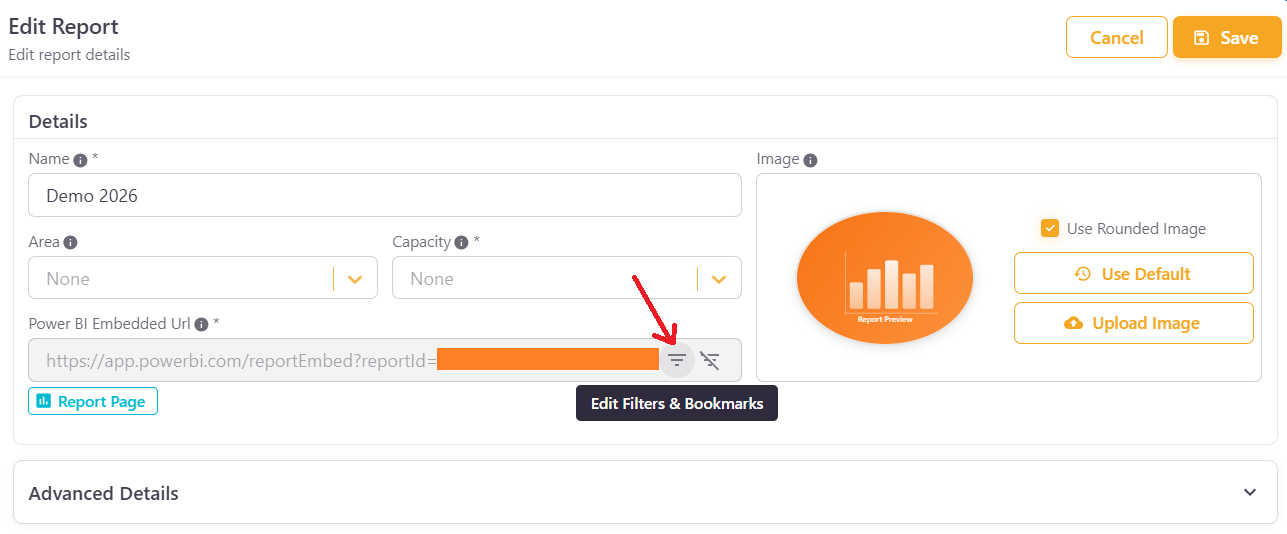
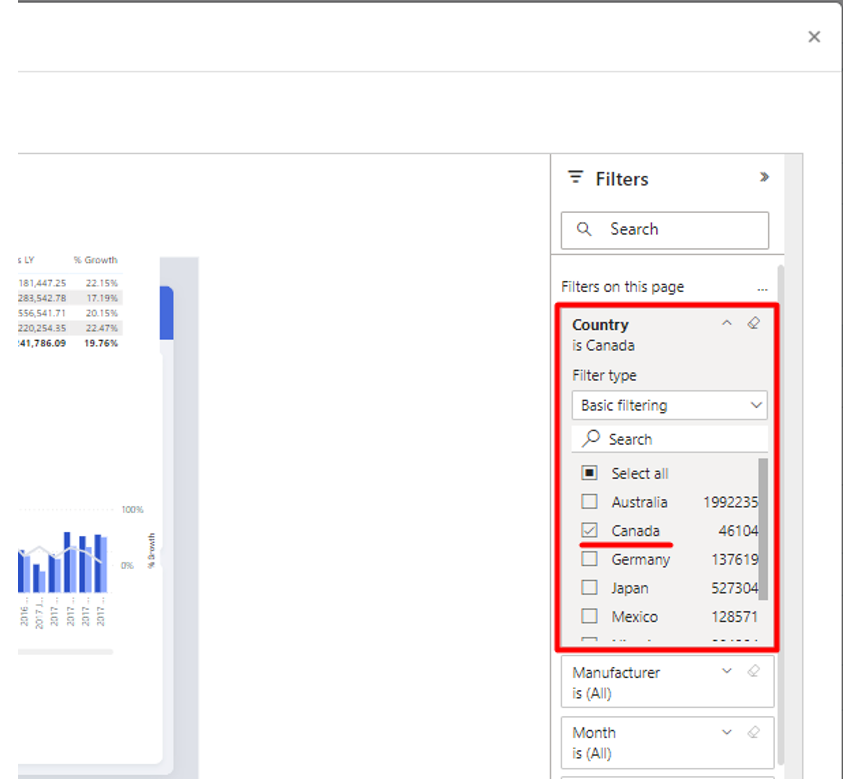
One quick way to get them is on the ‘Edit report’ page. Click on the filter icon and once the report preview window opens select one value, then click Apply to generate the code in the filter fields, and apply the token.
Edit Filters:
Select a value on the preview window:
The generated code should look something like this:

Now we need to replace the selected value with the token:
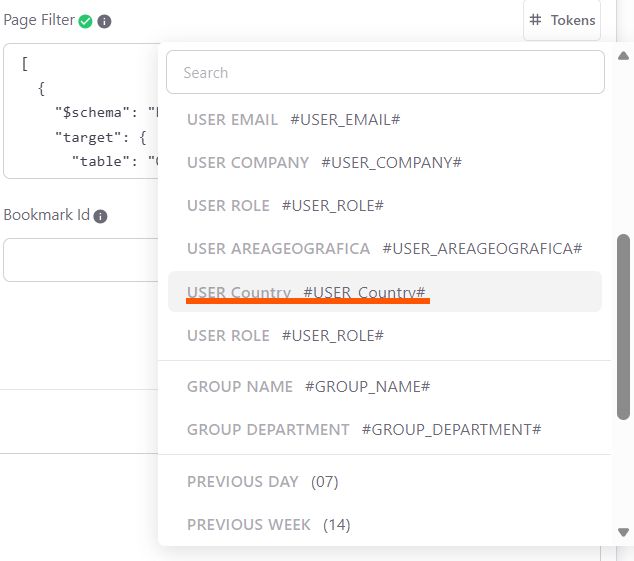
It should look something like this:

You need to save, and now each user will be filtered to the Country token value – User1 to Canada and User2 to Japan.
Row-Level Security⚓︎
If already created, you can reapply the same logic to each user in the Security & Filters tab of the report's Advanced Details. There are two fields related to RLS: Row-Level Roles and Row-Level User.
Row-level Roles⚓︎
Static Roles:
If you have static Roles, meaning the filter value is always the same, you just need to fill in the Row-level Role value with the RLS Role to be associated with the user.
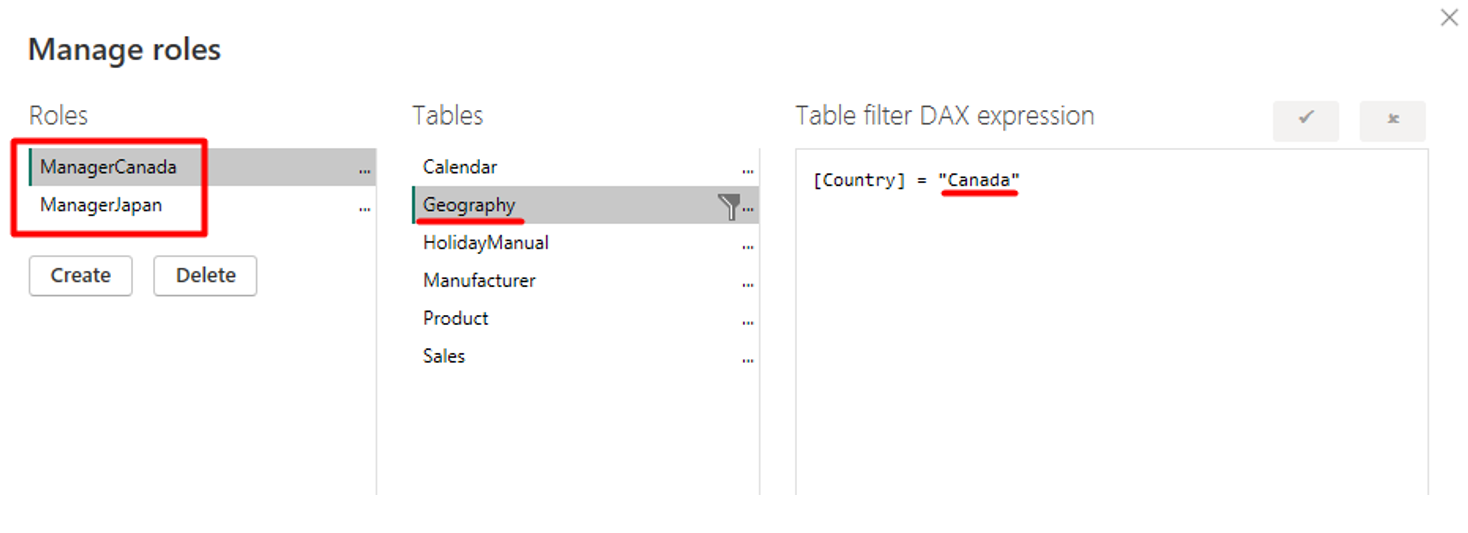
On Power BI Desktop we have the Roles ManagerCanada and ManagerJapan with static filters applied – Japan and Canada separately:
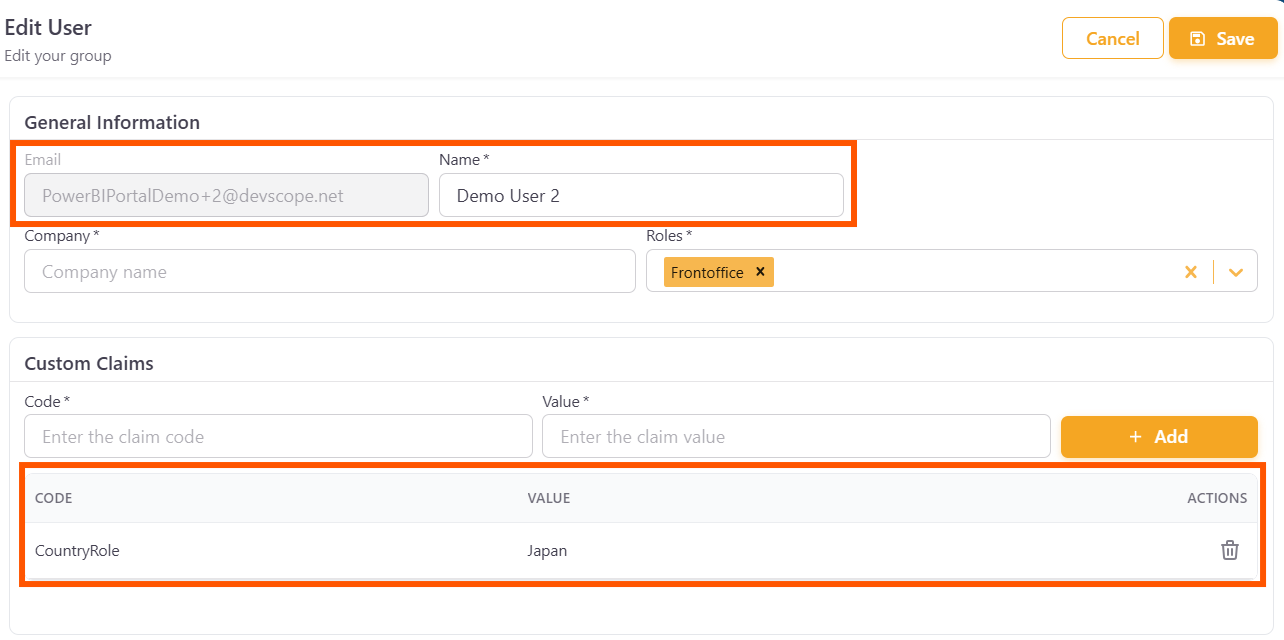
We edited the users and applied a new token named CountryRole – user1 has the value Canada, user2 Japan:
After saving, we edit the desired report and apply the token on the Row-Level Role:
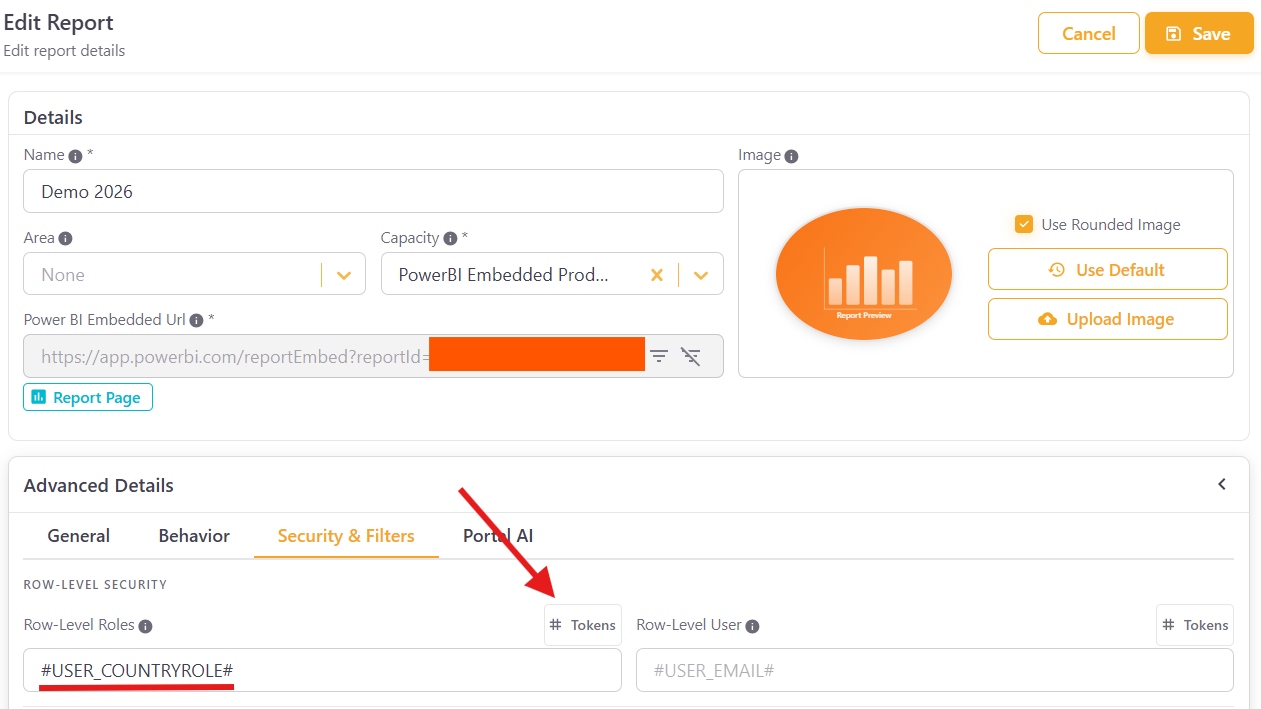
Now each user when accessing the reports will be attributed with the configured role.
Dynamic Roles:
If you have dynamic Roles, meaning the filter value within the Role can change, you just need to fill in the Row-level Role value with the RLS Role and the Row-Level User with the value for the user. As before we can use tokens to do it.
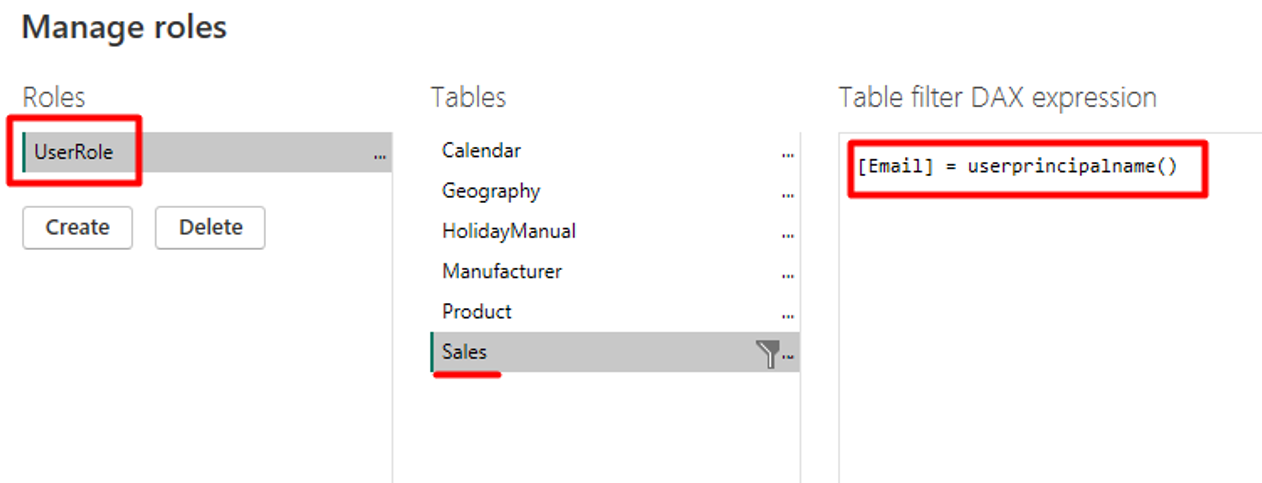
In this case, on PowerBI Desktop, we created a dynamic Role name ‘UserRole’ and it filters the Sales table with each viewers’ email:
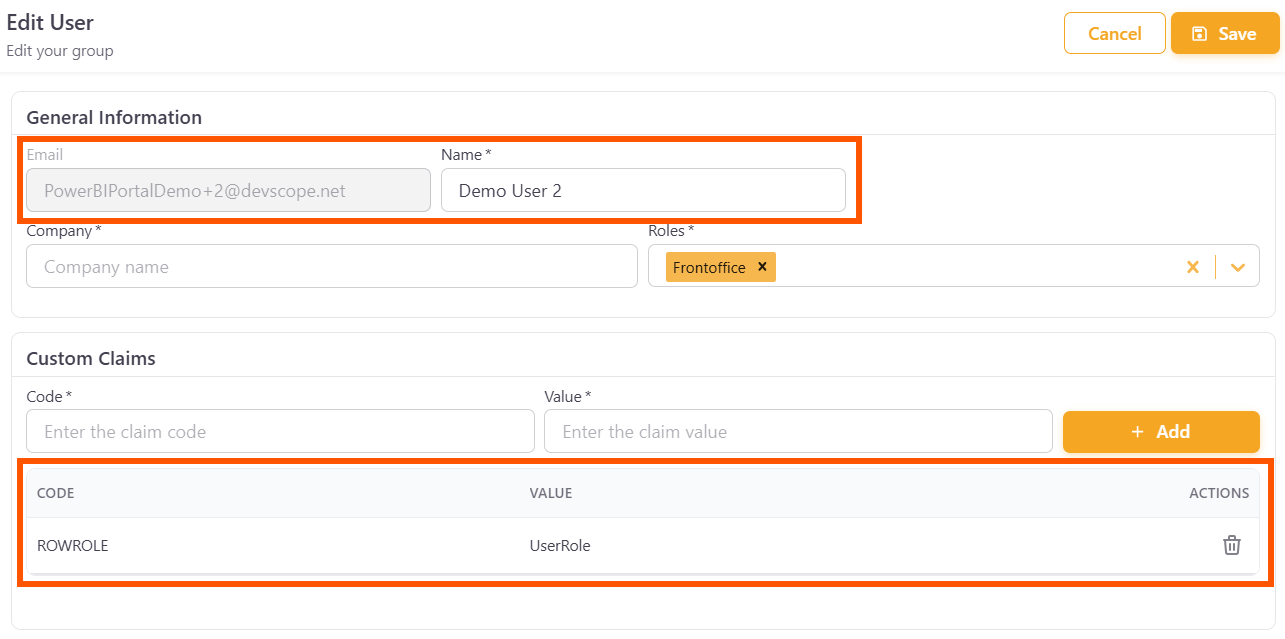
On PowerBI Portal we edit the user1 and user2 to have a Token named ‘RowRole’ and both have as value the dynamic Role created on Power BI Desktop named ‘UserRole’:
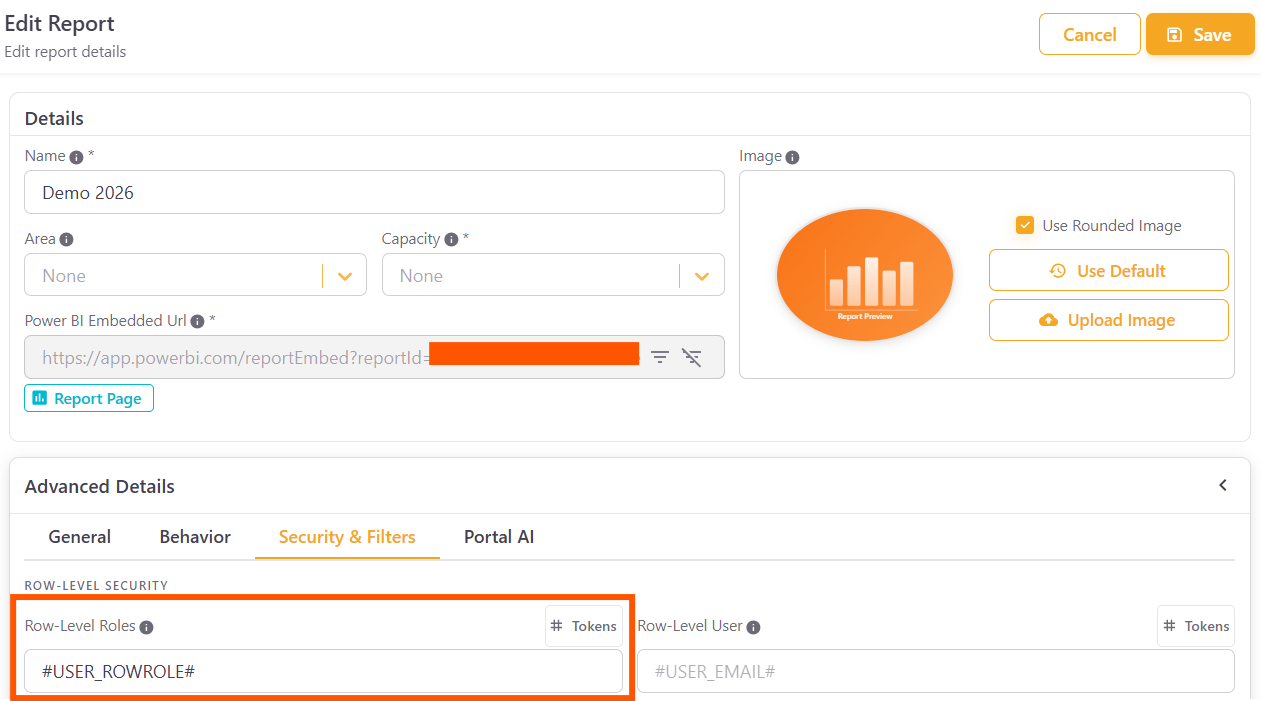
Now on the report we can add the token for the Row-Level Role and Row-Level User for this report.
Row-Level Role has the RowRole token, and the Row-Level User (since it requires the email value) has the email address token (created by default).
Applying these steps will allow you to replicate the dynamic RLS you have on your datasets.