Areas and Sub-Areas⚓︎
Areas and sub-areas organize your reports, files, data hubs and groups. Users see their content grouped by area in the Reports Viewer, and can select an area to narrow the list. Master and Backoffice users manage them in Administration > Areas and Sub-Areas.
Add an area⚓︎
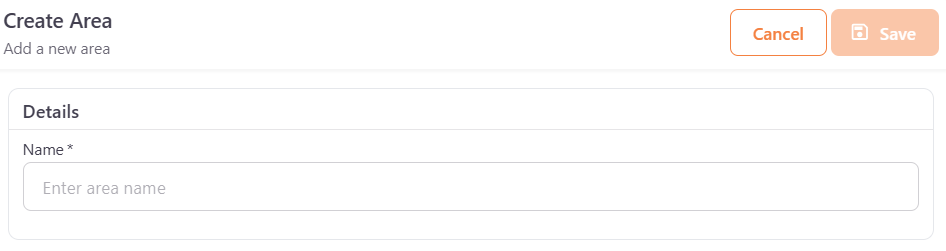
- Go to Administration > Areas and Sub-Areas and click Add Area.
- In Name, enter the name of the area.
- Click Save. The area is created and the form stays open, so you can add sub-areas.
Add sub-areas⚓︎
Sub-areas belong to an area. You can add them once the area is created.
- In the Areas list, click Edit on the area.
- In Sub-Areas, click Add Sub-Area.
- In the Create Sub-Area window, enter the Name and click OK. The name must be unique within the area.
- Click Save.
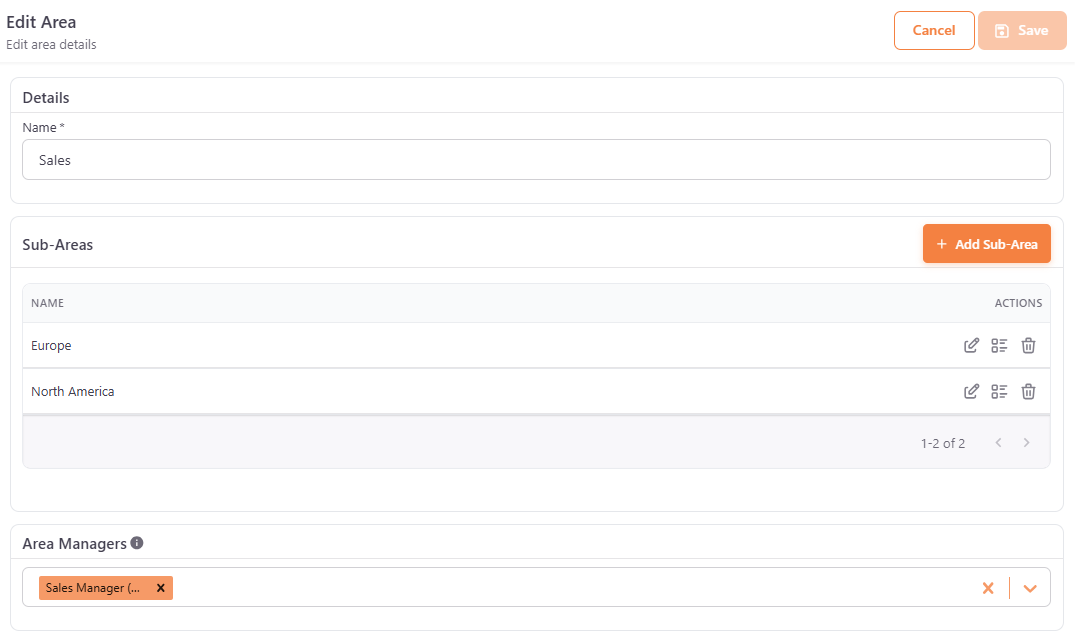
Sub-area changes are only saved when you click Save. If you click Cancel, they are discarded.
To rename a sub-area, click Edit on it, change the Name and click OK, then click Save.
Area Managers⚓︎
You can let specific users manage the reports, files and data hubs of an area, without giving them the Backoffice role. Assign them the Area Manager role in the user form, and then select them in the Area Managers section of the area. See Area Managers.
Area list⚓︎
The Areas list shows the Name of each area. Each area has the following actions:
- Associations: shows everything that uses the area. See View associations.
- Edit: opens the area to change its Name and manage its sub-areas and Area Managers.
- Delete: removes the area. See Delete an area or a sub-area.
View associations⚓︎
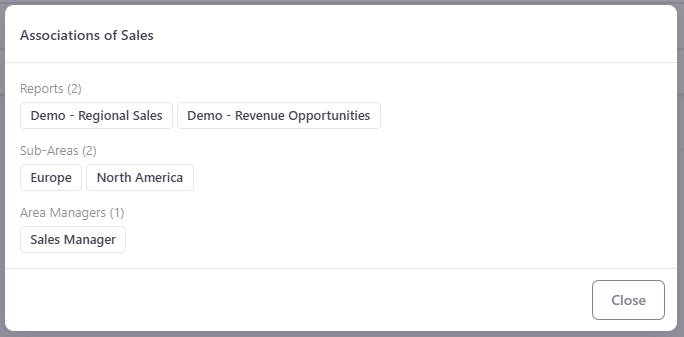
Click Associations on an area, or on a sub-area inside the area form, to see what uses it. The Associations of window lists, with the number of items:
- Reports
- Files
- Data Hubs
- Groups
- Sub-Areas (only for areas)
- Report access overrides
- Data Hub access overrides
- Area Managers (only for areas)
Only the types that have items are shown. If nothing uses it, the window shows No associations. The Associations action is not available for sub-areas that are not saved yet.
Delete an area or a sub-area⚓︎
- Click Delete on the area, and confirm the deletion when asked.
- If the area still has associated items, a message warns you. If you click Delete Anyway, the sub-areas are deleted, the Area Managers stop managing the area, and the other items no longer have an area.
To delete a sub-area, open its area and click Delete on the sub-area. If the sub-area still has associated items, a message asks you to confirm. If you click Delete Anyway, those items no longer have a sub-area. Then click Save.
Tip
Use the Associations action to review what is affected before you delete.
Assign an area to your content⚓︎
Use the Area and Sub-Area fields when you add or edit:
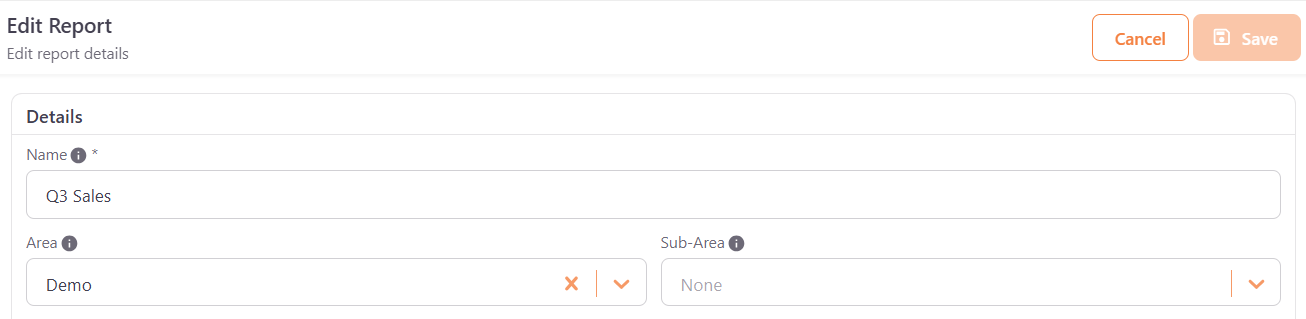
You can also create an area or a sub-area directly from these fields.