Power BI Capacities⚓︎
The capacity list allows you to register and manage the Power BI Embedded or Microsoft Fabric capacities used for embedding reports in the portal. PowerBI Portal can pause a capacity when it is not being used and resume it when activity is detected, to save resources. If you use Power BI Premium, you don't need to register a capacity: see Using Power BI Premium capacity.
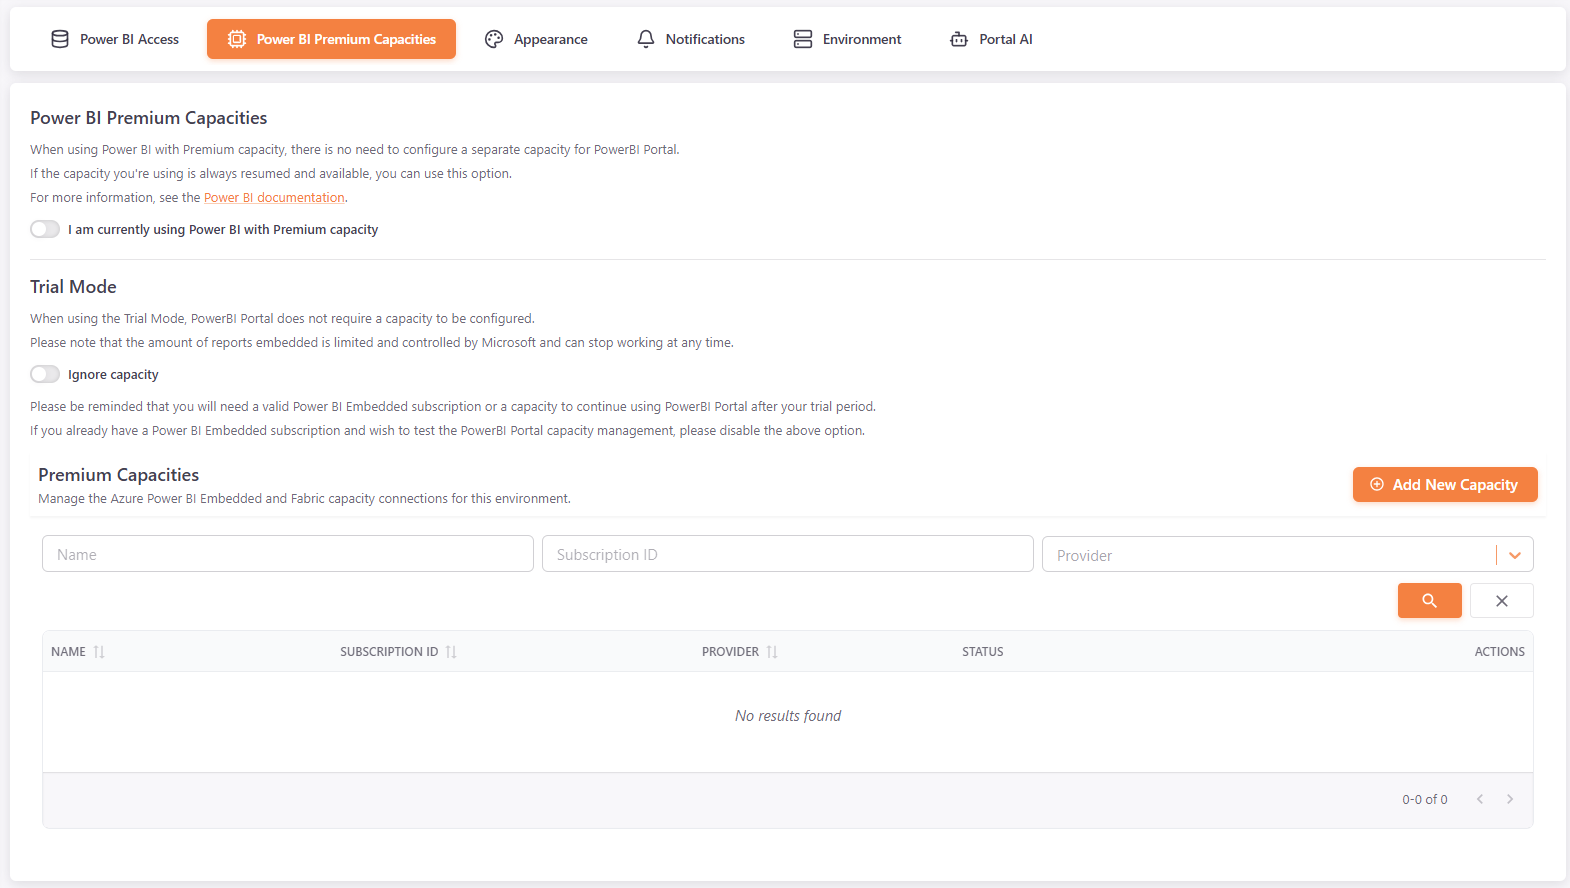
It is available to Master users, in Settings under the Power BI Premium Capacities tab.
Info
Capacities are accessed with the credentials configured in Settings > Power BI Access. See the Configuration Guide.
Using Power BI Premium capacity⚓︎
If you use Power BI with Premium capacity, PowerBI Portal does not need to manage your capacity, so there is no need to register one. Turn on I am currently using Power BI with Premium capacity at the top of the tab.
If the capacity you use is always resumed and available, you can also use this option. In either case, make sure you add reports from workspaces that use your capacity.
Trial Mode⚓︎
During a trial, PowerBI Portal does not require a capacity to be configured. The Trial Mode section is shown while you are on a trial, or while the option is still on after you purchase a subscription.
To assign a capacity to your reports and test the capacity management, turn off the Ignore capacity switch. If your subscription is already active, once you turn the switch off the option is no longer available, and each report needs an assigned capacity to open, unless you use the Premium capacity option above.
Note
The number of reports embedded in Trial Mode is limited and controlled by Microsoft, and can stop working at any time. You need a valid Power BI Embedded subscription or a capacity to keep using PowerBI Portal after the trial.
Viewing configured capacities⚓︎
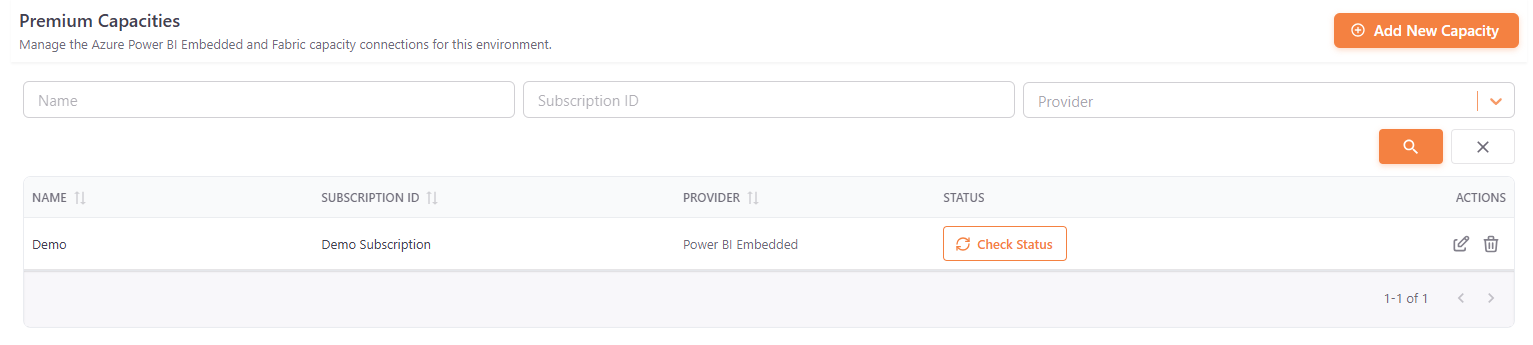
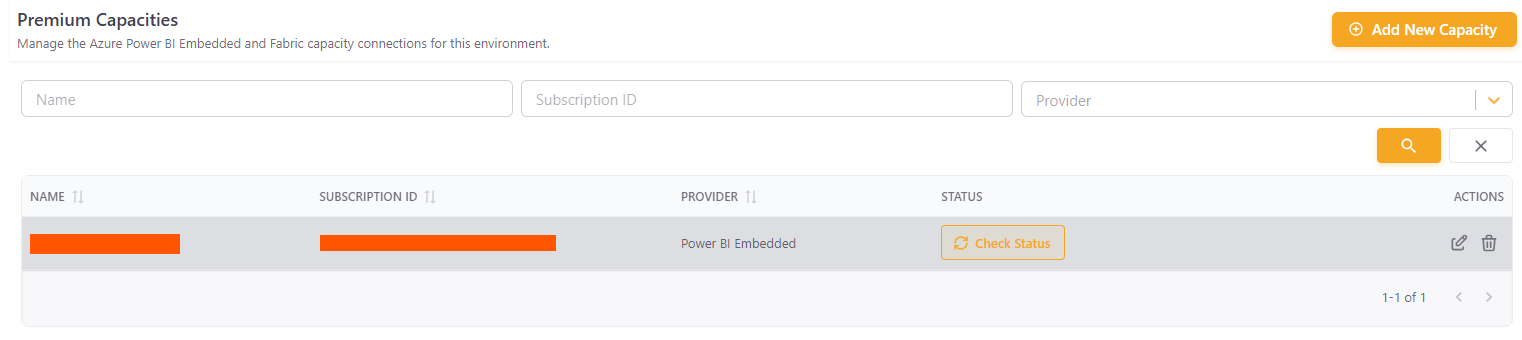
The capacity list shows all registered capacities with their Name, Subscription ID, Provider, Status and available Actions (edit or delete). A warning icon next to a capacity name means its automatic capacity management is disabled.
Adding a new capacity⚓︎
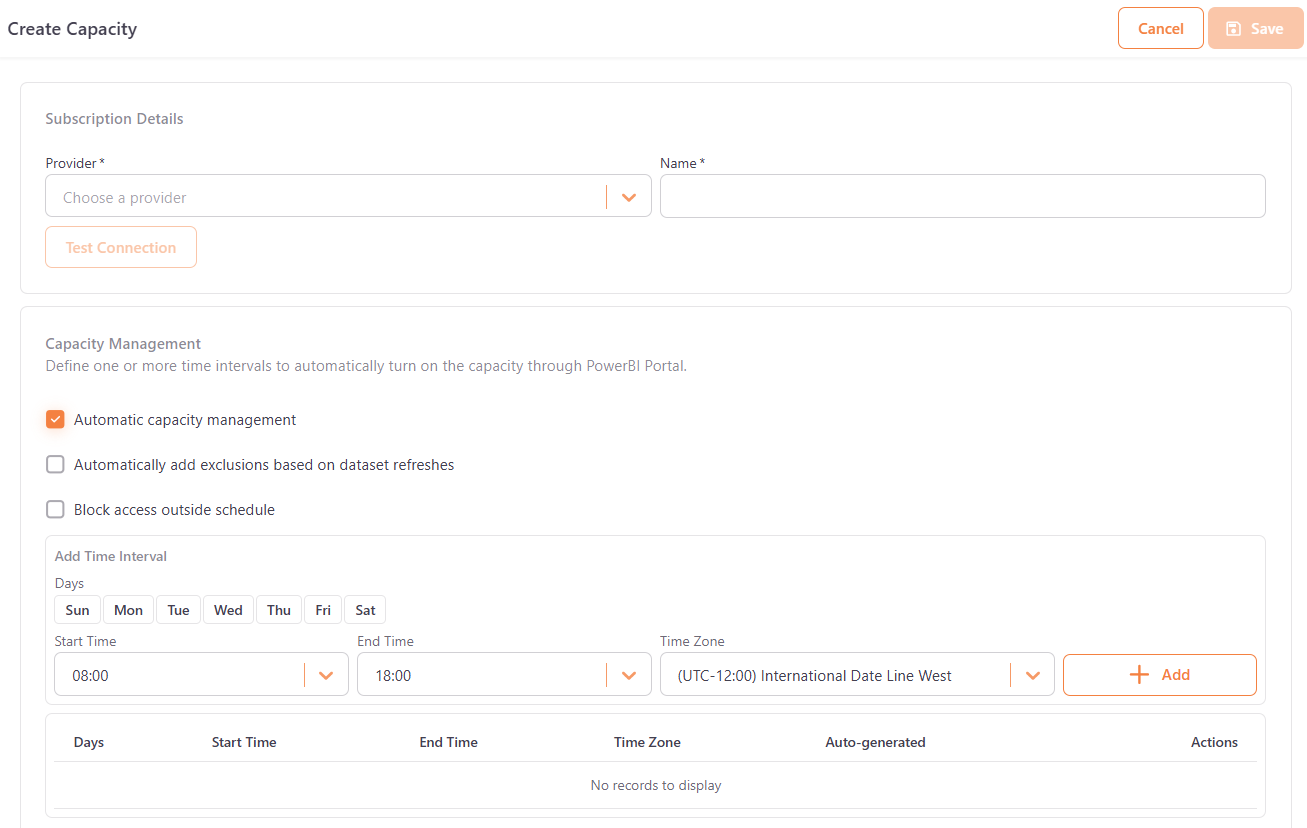
- Click Add New Capacity to open the Create Capacity form.
- Under Subscription Details, select the Provider: Power BI Embedded or Microsoft Fabric.
- Fill in the fields. All of them are required, except the timeout:
- Name: a display name for the capacity.
- Subscription ID: your Azure subscription identifier.
- Resource Group: the Azure resource group containing the capacity.
- Resource Name: the name of the capacity resource.
- Timeout (minutes): the number of minutes without activity in PowerBI Portal after which the capacity is automatically turned off. Use
0(the default) to keep the capacity running continuously.
- Optionally, set up the capacity management options.
- Click Save.
Tip
Click Test Connection before saving to verify your capacity configuration.
After saving, the new capacity appears in the capacity list alongside any existing entries:
To change a capacity, click the edit action. To remove it, click the delete action and confirm. If the capacity has reports associated, PowerBI Portal asks for an additional confirmation.
Capacity management⚓︎
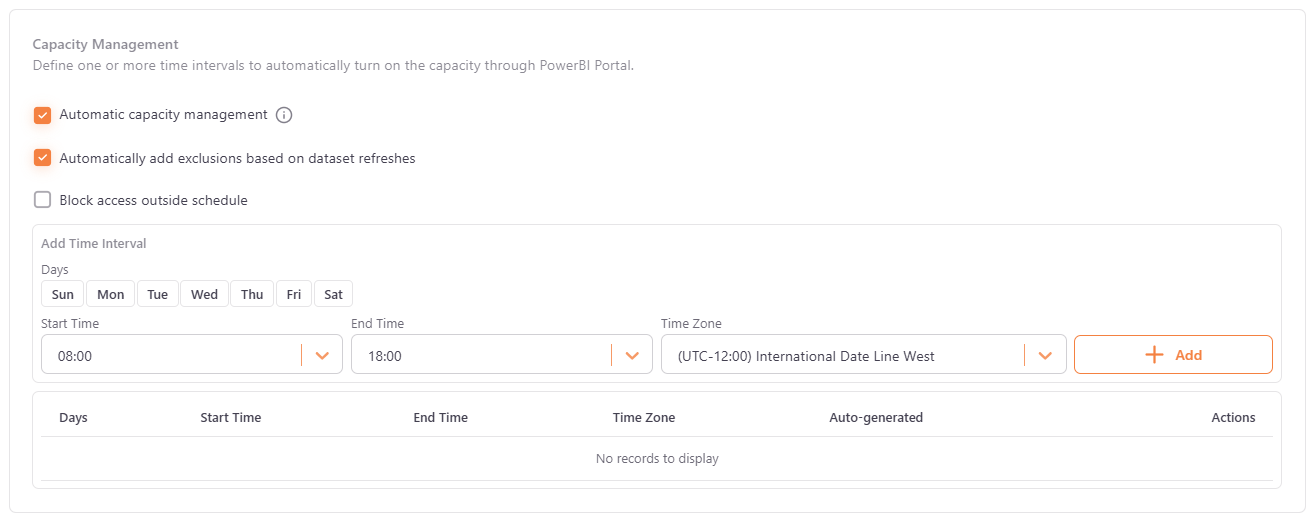
In the Capacity Management section of the form, you can:
- Turn Automatic capacity management on or off. When it is off, the capacity is no longer automatically paused or resumed by PowerBI Portal, and the Timeout (minutes) field is disabled.
- Define one or more time intervals to automatically turn on the capacity through PowerBI Portal. Select the Days, the Start Time, the End Time and the Time Zone, and click Add. Intervals created automatically are marked as Auto-generated and cannot be removed manually.
- Select Automatically add exclusions based on dataset refreshes: automatically creates exclusions covering the scheduled refresh times of the datasets behind this capacity's reports. Exclusions are updated once a day and only for datasets with a scheduled refresh enabled and at least one completed refresh, used to estimate the exclusion window duration.
- Select Block access outside schedule: users cannot access the reports outside the defined time intervals and, consequently, the capacity won't resume outside of the scheduled time.
Checking the capacity status⚓︎
- In the capacity list, click Check Status on the capacity row. PowerBI Portal connects to the capacity and shows its status.
- Use the refresh icon next to the status to check it again.
- When the capacity is Paused, click Resume. When it is Resumed, click Pause.
If no error appears and the status changes, PowerBI Portal is correctly configured to control the capacity. Resuming or pausing the capacity may take a few minutes.
Associating a capacity with a report⚓︎
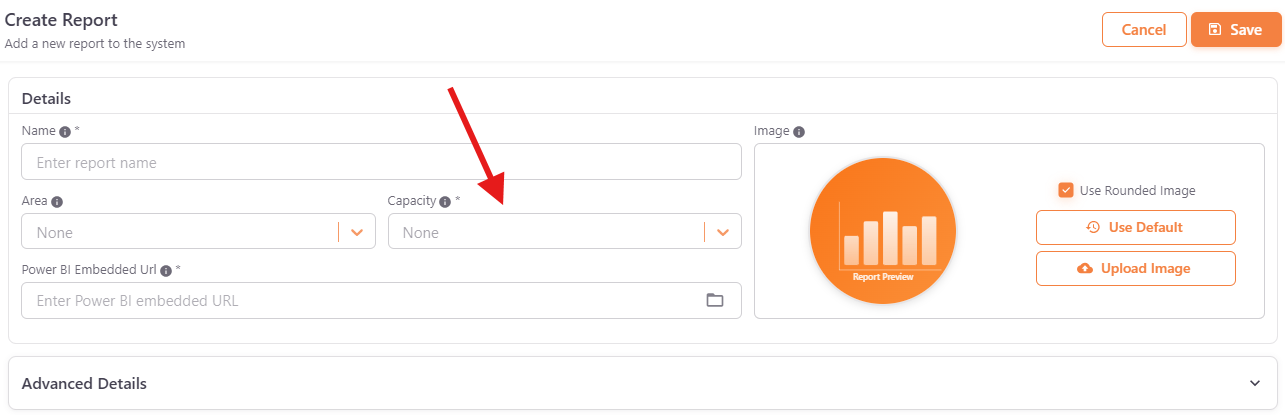
When you add or edit a report under Reports Management > Report List, select a capacity in the Capacity field. This determines which Power BI Embedded or Fabric capacity is used to render the report.
The Capacity field is required, except when you use the Premium capacity option or Trial Mode is on with Ignore capacity turned on. It is not shown when you edit only the report access.